We all have stories about the wonderful ways our own Nana and Papa (or someone else’s) have touched our lives. Whether your stories are about the rich family traditions handed down to your children, the warmth of a home and the sweet smells that come from it, or about how these special people love your children as unconditionally as you do, find a way that’s just as unique as they are to show appreciation for all they bring to you and yours.
Here are 4 unique ways to celebrate Grandparents Day:
1. A great fun-to-make, heartwarming-to-give craft. This unique, paper flower photo frame that kids can help create comes together with just paper, glue, and a bit a love.
2. Customized calendar with photos of your family together. Services such as CVS make it easy to use photos you already have to create a last-minute gift that lasts the whole year. Be sure to include photos of you, your children, and grandparents (and great grandparents!) sharing special moments or occasions, holidays and milestones.
3. Our Grammy and Pops Book. Together with your kids create a book chock full of all the things that make its recipients so special. Have your children draw pictures of their grandparents, and fill in sentences such as “I love it when my grandma and grandpa….” Even very young children can contribute to this project. Little kid drawings can be the most touching, don’t you think?
4. Family Dinner Celebration. Host a special night for your guests of honor, making it extra meaningful by tackling Grandma’s favorite recipes or serving foods that are family traditions. Children can cap off the meal by providing the entertainment, such as a dance performance, song or play.
Book a babysitter on UrbanSitter and let them take charge of Grandparents Day arts & crafts!
Ever wondered what the fuss is about receiving blankets? As a new parent, the world of baby items can be overwhelming, and you may find yourself asking, “What is a receiving blanket?” or “Why do I need it?” Well, you are not alone. Receiving blankets are a staple in the world of newborn essentials, and knowing their uses, safety measures, and what to look for when buying one can be a game-changer. Let’s unpack everything you need to know.
What is a Receiving Blanket?
A receiving blanket, often a go-to item in a newborn’s world, is a lightweight, thin blanket, typically measuring around a square yard. They are usually made of materials such as cotton, flannel, or bamboo, known for their breathability and softness. Parents often receive these blankets as gifts, hence the name “receiving” blankets.
What are Receiving Blankets Used For?
Receiving blankets are the Swiss Army knife of baby essentials. Their uses are as varied as your imagination. Here are just a few ways you can use them:
Swaddling: The standard blanket size provides ample room to comfortably swaddle your newborn.
Bath Time Cover: Some babies can be dramatic about bath time. Wrapping them in a blanket and rocking them a little can help calm them down and warm them up before bedtime.
Stroller Cover: In cooler weather or the summer heat, a receiving blanket works as a stroller cover to provide shade and warmth on walks or at the park.
Tummy Time Mat: If you don’t like the idea of your baby getting a face full of carpet or dog hair, simply lay down a blanket during tummy time.
Changing Mat: A receiving blanket is the perfect size and material to protect your baby from surfaces when you’re out.
Nursing Cover: Keeping a blanket nearby while feeding comes in handy. It can serve as a breastfeeding cover or a burp cloth.
Receiving Blanket Vs Swaddle Blanket
While these two types of blankets are often used interchangeably, there are subtle but significant differences between them. Receiving blankets tend to be smaller (18-30 square inches) as they’re made for newborns and made of cotton or flannel, whereas swaddling blankets are larger (40+ square inches) and often made with thinner fabrics like muslin and bamboo, making them easy to wrap and extremely breathable.
Safety Tips
When it comes to how you put your baby to sleep, safety is the top priority. Here are some safety guidelines to keep in mind:
Never leave blankets loose in a crib.
Never cover the baby with a blanket in the first year of life.
Never wrap blankets around the baby’s head or neck.
Given that these blankets are in constant contact with your baby’s skin, it’s worth considering organic receiving blankets. They are free from harmful chemicals and pesticides, ensuring that your baby’s delicate skin is not exposed to any irritants.
When choosing an organic blanket, look out for certifications like Global Organic Textile Standard (GOTS) or OEKO-TEX. These certifications guarantee that the blanket is made out of organic fibers and is free from harmful chemicals.
How to Choose the Best Blanket
When shopping for your baby, it’s important to consider a few factors:
Durability: Receiving blankets are often more durable than swaddle blankets, thanks to their slightly thicker material.
Breathability: Choose a blanket material that is breathable. Bamboo and cotton are the best choices for breathable and light blanket fabric.
Sensitive Skin: Bamboo is the ideal fabric for taking care of a baby’s delicate skin. It has naturally smooth and rounded fibers that cause less irritation than even the best organic cotton.
Neutral Prints: Gender-neutral prints are trendy, aesthetically pleasing, and practical. They can be used for all of your children and even handed down to friends.
Size: Opting for a larger blanket can prevent you from having to buy something bigger as your baby grows.
How Much Receiving Blankets Cost
The average price of a receiving blanket ranges from $10 to $20, while organic receiving blankets can cost upwards of $30. Some popular brands that parents like are:
Feeling crafty? Here’s a DIY step-by-step guide on how to sew a special one-of-a-kind receiving blanket.
Remember to always prioritize your baby’s safety and comfort when choosing a receiving blanket. Whether you’re buying one or making it yourself, ensure it’s soft, durable, and breathable.
Navigating the world of parenthood can be overwhelming, especially during the newborn and toddler stages. Let UrbanSitter help you find an experienced, background-checked nanny, babysitter, mother’s helper, or night nanny in your area. Trust us; a little help can go a long way during these early days!
Why not surprise a mom by helping her kids create a heartfelt, homemade gift to show their love this Mother’s Day? Roll up your sleeves, gather the supplies, and let the crafting begin! Here are 7 simple DIY gifts kids can create with a little help from you to make any mom feel special:
Download our Mother’s Day Coupon Book printable template to make an extra-thoughtful gift mom with coupons for “washing the dishes,” “folding the laundry,” and even “one hour of quiet time.” Have your little one color in and draw on each coupon to personalize it. Complement your coupon book with an UrbanSitter gift card!
Older kids can dive into a fun (and sustainable!) art project by creating yarn-wrapped vases for Mom. All you need are empty bottles, colorful yarn, and a pair of scissors. These beautiful vases are an easy and charming way to present a few flowers on her big day.
Gather your supplies: Empty bottles, colorful yarn, scissors, glue.
Prep the bottles: Remove labels and clean thoroughly.
Start wrapping: Tie a knot at the top and start wrapping, securing with knots or glue.
Switch colors: Experiment with different yarn colors for a vibrant look.
Finish it off: Tie a knot at the end, trim excess yarn, and tuck loose ends.
Another fun, easy craft for kids to do on Mother’s Day is to create a colorful flower pot. Find a recycled can or other small container, craft or popsicle sticks, and some glue. After the flower pot is finished, fill it with her favorite plant for a long-lasting gift that will keep her smiling.
Gather your supplies: Recycled can or container, craft sticks, glue, paint (optional), favorite plant.
Prep the container: Ensure it’s clean and dry.
Create the base: Glue craft sticks around the container.
Decorate: Add colors, drawings, or stickers for a personalized touch.
Fill it up: Fill the pot with Mom’s favorite plant once dry.
If you’re looking for an easy art project for Mother’s Day for a baby, using their fingerprints or footprints is a wonderful way to create sentimental art. One homemade gift for mom from a baby is to dip the baby’s feet into non-toxic washable paint and create footprints. After the paint has dried, turn them into butterflies with just a few swipes with a marker.
Gather your supplies: Non-toxic, washable paint, paper, and marker.
Dip and print: Dip baby’s feet in paint and make footprints on the paper.
Let it dry: Allow the paint to dry completely.
Add details: Turn footprints into butterflies with marker strokes.
Personalize: Write a message or date for an extra personal touch.
Truly a classic and perfect Mother’s Day craft for toddlers! Who doesn’t love a few tissue paper flowers, and even more so if they were created by the little ones they love. WikiHow tells you how to make them three ways. Gather the tissue paper, follow a few easy steps, and let the kids create a bouquet of love that Mom will adore.
Gather your supplies: Tissue paper, scissors, pipe cleaners.
Stack and fold: Stack several layers of tissue paper and fold accordion-style.
Secure in the middle: Use a pipe cleaner to secure the folded tissue paper in the middle.
Trim the edges: Round the edges or cut them into desired shapes.
Fan out petals: Carefully separate the layers to create a full bloom.
For the elementary kids, a simple Mother’s Day craft is this beautiful keepsake box. All they need to make this box are craft sticks or recycled popsicle sticks and embellish them with anything from beads, sequins, buttons, drawings, or even stickers. Mom will love storing her treasures here.
Gather your supplies: Craft sticks, glue, embellishments (beads, sequins, buttons), and paint (optional).
Create the base: Arrange craft sticks to form the base of the box.
Build the walls: Glue additional sticks to create walls.
Decorate: Add embellishments, drawings, or paint for a personalized touch.
Let it dry: Allow the box to dry completely before using or gifting.
A free printable background, cupcake liners, construction paper, and favorite photos are all it takes to make these adorable flower photos. Photos of children’s faces are cut into 1.5-inch circles and pasted to the center of the flowers. Once completed, these can be used to make a Mother’s Day card or a picture frame. For a picture frame, either buy a new frame or find an old picture frame and just remove the glass to make room for the 3D flowers.
via Raising Arizona Kids
More Mother’s Day Crafts…
As you delve into the joy of crafting DIY Mother’s Day gifts, why not expand your creative horizons with more crafting ideas? Consider handprint flowers, playful pom-pom projects, endearing handprint hearts, or versatile salt dough creations. Happy crafting, and may your celebration be filled with love and creativity!
Homemade Mother’s Day crafts like these are the ones that will truly touch her heart. She’ll appreciate the time and effort you made to help the kids create such meaningful Mother’s Day crafts. UrbanSitter.com gift cards make great gifts, too!
As luck would have it, there are oodles of St. Patty’s Day crafts to keep your kids happily entertained. We’ve rounded up 10 of our favorites that are just right for little ones.
Simple St. Patrick’s Day Crafts for Kids
Rainbow Streamers A simple craft made from a paper plate, paints and tissue paper strips.
via Activity Village
Handprint Rainbow Kids’ handprints made in every color of the rainbow lead to a pot of gold.
via The Logan Family of Five
Paper Bag Leprechaun It’s double the fun when you turn a paper sack into a googly-eyed leprechaun who makes for a perfect puppet.
via Pin Inspired
Rainbow Necklace Buy a box of fruity O’s cereal and help your child string a rainbow (or make it leprechaun green) on a shoe string. You’ll have a fun project, cute necklace and a yummy snack.
via Eighteen 25
Shamrock Bouquet Here’s a craft that’s as much fun for Mom as it is for the little ones. Make an adorable bouquet of shamrocks using the handy template provided here, and you’ll have a happily entertained crafter and a cute centerpiece for the table.
via Sweet and Lovely
Paper Rainbow A simple craft for even the tiniest tots. Glue dots make it even easier and eliminate the mess.
via Scrappin’ Danielle
Leprechaun Green Oobleck If you haven’t yet played with the strange, non-edible substance called Oobleck, here’s your chance. Make a green batch!
via Food.com
Green Pepper Shamrock Stamp A green pepper easily becomes a shamrock stamp. Who knew?!
via Family Fresh Meals
Pot of Gold There’s a template for a shamrock and a pot, but we’re guessing you won’t need them to create this adorable pot of treasures.
via Play and Learn with Dana
Leprechaun Beard Love, love, love this DIY leprechaun beard you can make for a fantastic dress-up accessory.
via No Time for Flashcards
Search for crafty sitters on UrbanSitter.com! How will your family celebrate St. Patrick’s Day?
We recently surveyed parents and most rank “decorating the tree” as their number one holiday tradition. While others rate visiting Santa, watching holiday movies and building a gingerbread house among their holiday must-dos. How is a busy parent to fit it all into a scant few weeks of holiday time? Take a look at these time-saving tips for planning, organizing and enjoying favorite family holiday traditions.
How to Save Time On Your Favorite Holiday Traditions
1. Decorating the Tree (and the house)
No more scrambling to find the time and choose a tree – pre-order from a local nursery, church or school selling Christmas trees. You’ll have the perfect tree, with your specifications, waiting for your pickup at a pre-arranged date and time. Some sellers will even deliver it to your doorstop.
Consider an artificial tree. While there are those who couldn’t fathom the thought of foregoing the real thing, there are plenty of converts who insist on a faux tree for many reasons, including the ease and speed of setting it up.
Determine how you want your decorated tree to look, whether it be a color scheme, a feel (old-fashioned or modern), or make a commitment to homey, handmade decorations. Having a look in mind will keep you from buying loads of unnecessary ornaments or stressing over how to decorate it.
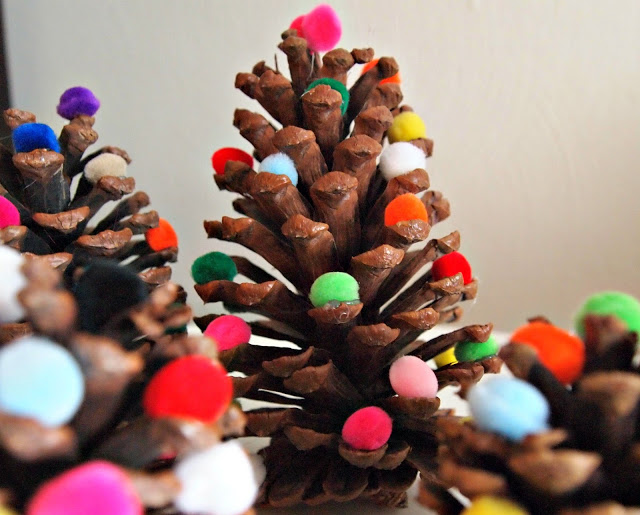
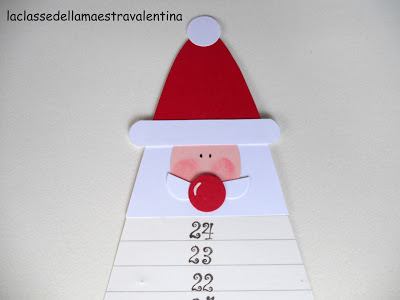
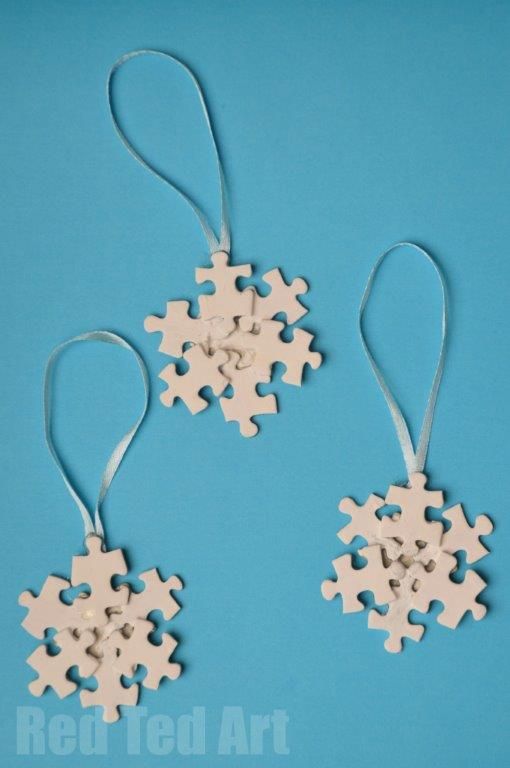
Spend a few minutes on Pinterest to find kids crafts that will entertain your kids and serve as decorations. A few of our favorite finds, include:Pinecone Tree via little black door
Rely on Mother Nature to help decorate the rest of your house, too:
When you’re picking up your tree, buy an evergreen wreath for the front door and pick up some boughs or even just scrap cuttings to decorate the mantel, top an entryway table or tie to the banister.
Gather a few winter branches or sprigs of holly to plop into vases and jars for instant tabletop décor.
Have a fireplace? Why not stack a neat pile of chopped firewood indoors for a woodsy, wintery atmosphere. It’s nice to know a warm fire is at your ready.
Invest in sturdy, reusable containers for organizing your holiday decorations. Stores such as Target and the Container Store offer bins and boxes designed for strings of lights, fragile ornaments and wreaths. While it’s tough to add another expense to the already-stretched holiday budget, think of these organizers as a worthy investment. They will save you time and expense, keeping your decorations safe and making it faster and easier to decorate next year.
2. Visiting Santa
Do your homework and plan ahead to avoid wasting your day away in an unbearably long line for Santa:
Veteran, Santa visiting parents advise that you can find the shortest lines at a store when the venue first opens, during weekdays and early on in the season.
Lesser known or less popular locations for visiting St. Nick are often far less crowded than places like the Herald Square Macy’s in NYC. If you can’t give up the thought of seeing the Big Guy in the Big Apple, consider Santaland Express at Macy’s. Reservations are available up to 48 hours in advance. You can reserve using the Macy’s app on your smartphone (iPhone app/Android app) or in person at Macy’s Herald Square at kiosks located in the Cellar and 9th Floor.
Accept that no matter where you go, you’re most likely in for a long line. Be prepared with snacks and small toys to keep the kids entertained while they wait.
Consider sneaking a peek instead of sitting on his lap. Many places offering visits with Santa will allow you to get up close to the big guy without waiting in line if you’re willing to just sneak a peek and maybe get and give a little wave, instead of having a seat on his lap.
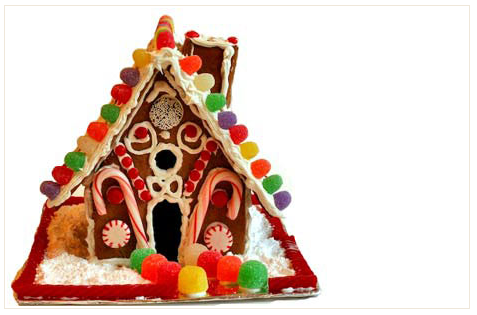
If you’ve done this before, you know that assembling these tiny, candy-bejeweled creations is far more work than one would expect! Make it easier, faster and tons more fun with these helpful tips:
Leave the assembling to the experts. Order pre-baked, pre-assembled gingerbread houses to avoid the painstaking task of building a house that stands and stays standing. You can order through a local bakery or online.
If you insist on building your own (or forget to order a pre-assembled one!), opt for using graham crackers instead of gingerbread. It’s far easier.
To hold your house together at the seams and keep the candy from falling off of it, use Royal Icing. Here’s the recipe from Simply Recipes.
Shop in advance for kid-friendly decorating tools and materials. Keep it simple by using these time-tested favorites: gum drops, candy candy, licorice strings, small lollipops, and peppermints. Buy more than you think you’ll need, since your builders will likely devour much of it before it ever makes its way to the gingerbread house! If you have tiny tots involved, remember that candy can be a dangerous choking hazard and small pieces should be avoided if little hands are involved.
With a little advance planning and expectation setting, these popular holiday traditions can be a wonderful way to enjoy the holidays with your children. By keeping it simple and relying on the helpful tips shared above, you’ll be able to focus on the fun and keep the stress and expense at bay.
UrbanSitter.com is always ready to meet your childcare needs – any season of the year.
Just like every year, Father’s Day is coming up in June! Get ahead of the curve and start the kids on a homemade gift craft project! Choose one of these simple DIY Father’s Day gift ideas from kids, get your kids busy at the kitchen table with either you or a babysitter to lead the charge, and in no time at all you’ll have a touching and memorable gift to give Dad for Father’s Day.
Terrarium
We can guarantee this awesome gift won’t end up stuffed in a drawer or lost by the end of June. A terrarium is a way cool way to add a little green space to Dad’s world. These instructions from Hallmark’s Think.Make.Share blog are easy for kids to create this in one hour. And it does sound pretty simple – choose a wide-mouthed, clear container; fill with the appropriate soil or sand; plant small succulents or seedlings; and water moderately.
Terrarium via Hallmark Think.Make.Share
Bright and Brilliant Picture Frame
Dad will be happy to replace the boring old photo frame he has displayed on his desk or bedside table with this customized frame creation. Choose a sweet photo of your child, whether it be a school portrait or a candid shot, and insert it in a simple wood frame. The frame pictured here is from Ikea and cost $2 for 3. Have the kids paint the frames black, and once the paint is dry, mod-podge with bright mosaic paper squares like these from Lakeshore.
Frame via Teachers Bits and Bobs
Daddy Questionnaire
Another Father’s Day gift idea kids from kids is to turn a free printable “All About My Daddy” questionnaire into a framed piece of art that’s bound to keep Dad laughing for years to come. The framed questionnaire pictured here uses a custom questionnaire created by Mom and filled in with the answers her child provided. The completed questionnaire was matted and framed in a simple white frame and decorated with a miniature banner created from craft paper and twine. Here’s another free printable questionnaire we found, or create your own. Definitely don’t forget to include your child’s age — it speaks volumes about the thoughtful responses.
Questionnaire via Free Pretty Things for You
Homemade Sweet Treats
Haven’t they always told us that the quickest way to a man’s heart is through his stomach? Give it a shot. You and the kids can whip up some yummy Dad’s Day cupcakes, a batch of his favorite brownies, or even a big waffle breakfast. You’ll have just as much fun baking the goodies as Dad does gobbling them up. Be sure and make extras for tiny tasters. Need some inspiration? Check out these cool cupcake creations for Dads who like to fish, Dads who like to golf, and for those who simply sport a tie. Cupcake images found on Pinterest.
Looking for a sitter to take that special dad out for Father’s Day? Join UrbanSitter to browse profiles and book jobs online.
No matter where you live, there’s no way your family can spend Memorial Day inside of a restaurant! If you haven’t received an invite to a backyard barbeque, it’s time to plan your own. Get the kids involved and throw a fabulous kid-friendly Memorial Day BBQ Bash. Our checklist will have your party planned in no time.
Your Guide to Hosting a Memorial Day Barbecue Party
The Vibe
Memorial Day is a day to celebrate our fallen soldiers and the country they’ve served. It’s about patriotism and red, white and blue. Let the theme set the scene:
Fill mason jars with simple flowers, such as white tulips, daisies and blue hydrangeas. Tie the jars with a festive ribbon and, if you like, stick a miniature flag into it to add to the theme These make great centerpieces or decoration on a buffet or bar and are a fun, easy activity for children.
Twinkling lights always make a night feel special. Hang up strings of tiny fairy lights for a festive look when the sun goes down.
Use red or blue cloth napkins and simple white melamine plates so there’s no extra waste or worry over broken dishes.
Get the kids to organize some All-American entertainment. Who doesn’t love a game of kickball, flag-football or badminton, if you can get your hands on a net, racquets and a few birdies. It just might become a Memorial Day tradition on your block.
Give the kids a memorial day activity or craft, such as creating red, white and blue slime from I Can Teach My Child. It’s an outdoor party, right? Or create a patriotic suncatcher from A Little Pinch of Perfect.
The Food
It’s all about the grill, whether it’s parked on your patio or in the park. Choose two main entrée options – one for the meat lovers and one that’s vegetarian.
Burgers are always a fan favorite at outdoor barbeques. You’ll find every kind of burger recipe imaginable, all claiming to be “the best burger recipe ever.” To keep it simple and kid-friendly go with a classic burger and guests can make it fancy or not based on the toppings you have. For the kids, a side of ketchup and pickles is all they need.
Crispy Quinoa Sliders are a tasty and fun vegetarian option. Even the meat-eaters will be eyeing it in envy, so make extras.
Quinoa Sliders from How Sweet It Is
Side dishes are the perfect option if a guest offers to bring something to the family barbeque. Popular sides include salad, pasta or vegetable dishes. Keeping the kids in mind, a patriotic fruit salad is sure to be a hit – add strawberries, blueberries and watermelon. A caprese skewer of mozzarella balls, watermelon and a blueberry or two on top also keeps with the red, white and blue theme and is enjoyed by kids and adults alike.
The Drink
BYOB (to share!) always works, as well as providing a good selection of alcoholic and non-alcoholic beverages. Since it’s an outside bash, forego anything fancy or fussy and stick with a few choices of good beer, and chilled white or rose wine
Another good route is to create a signature cocktail that guests can serve themselves from a big pitcher or punch bowl. Good Housekeeping has an extensive list of memorial day signature cocktails that may have your mouth watering. Try out their backyard lemonade or the ginger mint margarita.
The Finale (Dessert!)
Everyone loves a good dessert. Make it a DIY “event” and the kids will have a blast. With a little prep, you can create the ultimate s’mores bar or ice cream sundae buffet Here’s a handy list of what to pick up to make your dessert bar a success!
For S’more Building:
Graham crackers
Marshmallows (there’s one than just the plain white ones)
Milk chocolate, white chocolate, and dark chocolate bars
For Sundae Building:
Ice cream – mostly vanilla, but throw in a gallon or two of chocolate, strawberry or pistachio.
Chopped fresh fruit, such as bananas, peaches, strawberries or whole blueberries
Maraschino cherries
Cookie bits (crush Oreos or chocolate chip cookies)
M&Ms or other candies
Raisins
Shredded coconut
Chopped peanuts or walnuts (if there are no allergies amongst the guests)
Candy sprinkles
Chocolate sauce or hot fudge sauce
Carmel sauce
Whipped cream
Ask your kids to help plan the memorial day barbeque bash and especially what to have for dessert! The more involved the kids are, the more fun they’ll have!
Now all you need to do is invite your guests. If your guest list includes a lot of kids, find a babysitter to help you out!
With temperatures reaching inhumane lows across the country, you or your sitter are likely trapped in the house with the kids and in near desperate need for new ways to keep them entertained. Save your sanity with these fun ideas for keeping little kids happy and engaged.
10 Creative Ideas for Entertaining a Toddler (in the dead of winter!)
1. Fill the tub or the kitchen sink! It’s time to bathe the toys, give the Barbies a spa day or host a car wash. If you really want to surprise your kids, hold the water and instead fill the tub with dried beans or rice and let them scoop and fill to their hearts’ content.
2. Build a slide or tunnel for toy cars to race down and under, using a piece of cardboard atop stacks of books or copy this creative masking tape roadway. Take it a step further with a DIY wasabi race track.
via Le Jardin de Juliette
3. Create a fort by draping blankets over chairs and other furniture, and pretend it’s a house, boat or a plane. The opportunities are endless. If your kids love forts, consider creating this no-sew teepee from The Handmade Home.
via The Handmade Home
4. Throw a dance party. Crank up the music and let loose. Get in on the fun and you can knock out your daily workout.
5. Brave the outdoors and create an ice skating party for dolls or action figures, a la the one by Happy Hooligans. She also has an ingenious post on making paint for painting the snow.
7. Toddlers love to push and pull things. Take a toy wagon or baby stroller outside and let them “mow the lawn” or plow the snow.
8. Taste test the art supplies!? Yes, break the rules and let them eat the paint with edible finger paints. You can stress less about the mess, since they are made with condensed milk. Super simple!
via Healthy Mama Info
9. Reminisce by going through family photo albums and watching videos made when they were “young.” Slightly older kids will enjoy the walk down memory lane, too. You can take it a step further by talking about their family tree.
10. DIY Matching Game. Use whatever you have on hand, from the socks in the drier to cut lengths from a few spools of ribbon to keep a toddler busy matching.
via The Fickle Pickle
What’s your favorite Winter-time activity? Have you made/done any of the pieces on this list? Tell us in the comments!
There’s a lot of contradictory and downright erroneous parenting info floating around out there. We’re not afraid to tackle it head-on!
Throwing a birthday party for your child can feel like anything but a celebration. Instead of rejoicing another year older, parents of even very young children can feel pressured to throw extra-special bashes that rival the ones they see plastered on mom blogs and boastfully circulated through social media. Research published in the Journal of Consumer Culture shows that the pressure to live up to modern-day expectations of what makes a fab party is leaving many parents stressed out and insecure about their ability to pull it off; and likely giving kids the wrong message about what a birthday celebration is supposed to be.
To help parents maneuver party planning obstacles and banish unrealistic expectations, while still throwing a party that won’t disappoint, we spoke with Lisa Gaché, an etiquette expert who often advises on event hosting; and Alison Smith, co-founder of ECHOage, a company transforming party planning by having guests pitch in on a special present or donate to a charity, both chosen by the birthday guest of honor. The two teamed up to set the record straight on three common myths related to planning kids’ birthday parties.
Myth #1: A great party means a mammoth guest list. After all, I have to invite my child’s entire class, and also plan for parents who decide to stick around.
Truth: The etiquette rule, according to Gaché, dictates that if you are planning a big party you really should invite your child’s entire class—at least for grade school or younger kids. You don’t want to risk hurting anyone’s feelings or riling parents by excluding classmates from the celebration. But there are good reasons to keep the party small, including budget, space, and your child’s comfort; many young kids can feel overwhelmed by too many guests, and enjoy a more intimate, lower-key gathering.
The solution, both experts agree, is to host an all-girls or all-boys party, or stick with six kids or fewer. Smith suggests creating a party that specifically lends itself to a smaller group, such as a sleepover or an outing to a special event—think concert, amusement park, or sporting event. If you’re worried about hurt feelings from friends who don’t make the invite list, consider planning a special play date or inviting them to a family dinner.
Regardless of the number of invitees, expect that the parents of kids younger than age five will likely stay, rather than drop-off their tot. “Your goal is to make sure they feel welcome and integrated,” says Gaché. Offer them whatever you’re feeding the kids—chicken tenders and pizza triangles are just fine, she says. Smith suggests setting up a self-serve coffee bar for parents who choose to linger.
And rest assured, once kids hit the middle school years, parties are typically smaller, and the invite list can be left to the guest of honor.
Parents are opting out of over the top parties like these and hosting simple celebrations.
Myth #2: The competition for throwing a fabulous party is intense! I need to match, if not outdo, the birthday bashes my child attends.
Truth: The trend of over-the-top, commercialized parties—parents hiring garage bands or taking a gaggle of tween girls in a limo to a five-star dinner—lives on. But it’s recently been rivaled by customized, personalized parties that impress guests—or more likely, their parents—with hands-on party planning, homemade food, and Pinterest-worthy DIY decorations. “There’s tremendous pressure to be an expert crafter, a professional photographer and a videographer at your child’s party,” says Gaché.
Luckily, plenty of parents are realizing the insanity of both types of this extreme and are moving to simple, age-appropriate celebrations with cake, food, and a bit of entertainment. Opt out of the craziness, and join that party. Smith suggests skipping the meal, even, and offering only cake and ice cream, which are all everyone really expects at a birthday party, anyway; or picking one wow factor, such as hiring an ice cream truck for the night. Alternatively, take the family out for a special dinner at the birthday boy or girl’s favorite restaurant, and avoid setting big expectations for every birthday to come.
Myth#3: My closets are over-flowing with gifts my child doesn’t need or already has, but I can’t ask guests to forego the gift. People feel so uncomfortable showing up empty-handed.
Truth: “The rule is that ‘no gift’ means no gift,” say Gaché. But guests don’t always comply, leaving those who didn’t bring something feeling awkward. “Society dictates that showing up to any party empty handed is uncomfortable unless there is another plan in place,” says Smith. So, make just such a plan: encourage guests to contribute to a group gift—something your child really wants or needs—or to give to a charity of the guest of honor’s choosing. “Everyone feels great about giving without having to show up to the party with a gift in hand,” says Smith.
Gaché, on the other hand, says asking guests to donate to a charity can rub some of them the wrong way (and also risks disappointing your kids). Instead, she suggests asking guests to bring something for an activity the children will partake in at the party; for instance, paint for an art project, or candy for cupcake decorating. This approach also allows you to forego expensive favors by sending kids home with their completed projects instead of a goody bag. Think of it this way: You’re saving parents from shopping for yet another birthday party gift, keeping clutter from your closets, and teaching your child that the celebration is about the company of their guests, and not the gifts they bring. Now that’s something to celebrate!
When you’ve got a lot of projects to take are of around the house, your first instinct might be to send the kids out of the house on play dates, or into the yard with their toys. But getting your children involved in working around the house presents many great learning opportunities and, when taught correctly and monitored appropriately, can actually help you get your work done faster!
Below are five easy home projects the whole family can get involved in, from our friends at HomeAdvisor.
1. Painting the walls. You can paint the high parts of the walls; your kids can help cover the lower areas. It’s a project most of them will love, and it also gives them a beginner handyperson’s education in undercoats and how to place tape to avoid painting the baseboards. You will need to supervise them throughout the process, but the sense of accomplishment they’ll feel when they actually get to see the completed room painted a whole new color is enormous. If they’re too little to really help, let them show their creativity by painting smiley faces, clouds, flowers, that you’ll paint over later.
2. Clean out the drains. Drains get stopped up over time, but there’s no need to use chemicals to un-clog them, unless you’ve gotten something major stuck down there. Baking soda, salt, and cream of tartar mixed together into a paste is a concoction that’s safe enough for children to use, and strong enough to get the job done. Let the kids pour this mixture down the drain, then follow it up yourself with a kettle full of boiling water you pour down yourself. Let it stand for 30 minutes to an hour, then let your kids run some fresh sold water through the drain to finish up.
3. Give the mailbox a makeover. Over time, your mailbox can take a beating. This is a great project to get your kids involved in. Wash the mailbox with sponges, water, and mild soap to remove all debris. Then decide: does the box simply need a fresh coat of paint? A new house number? Decorations like flowers or flags? Let everyone in the family have a say—and a hand in making your designs come to life.
4. Plant a container garden. Kids love to get down in the dirt, so why not redirect that enjoyment towards something with an actual purpose? They can create holes for young plants and seedlings, get them situated, and water them in. You can also let them choose some of their favorite fruits and vegetables to plant in the garden—they’ll be so excited to see the plants they’ve chosen shoot up and get bigger day by day.
5. Get them involved in overall house-cleaning. While this might seem like a big chore, you can help kids find a fun way to get involved in the process. Show them how to swish a feather duster around with flair, and they can dust off your end tables and other low-lying areas. You can also make tidying their rooms into a game: how fast can they stack the blocks, or how many dolls will fit in one cubby? Not only does this help you (a little), it helps your children learn good practices that will benefit them through their whole lives.