4 Easy Summer Crafts for Kids

tropical fish craft

When it’s too hot to play outside, bring the kids to the table for some fun, attention-grabbing summer crafts that make the most of rocks, paper and scissors.

Go Fish!

No one is left out on the fun of making little fishies. Big kids can tackle a more involved project like these adorable DIY Japanese Fish and little kids can stick with a quick, instant gratification project like making Tropical Fish from Paper Plates.
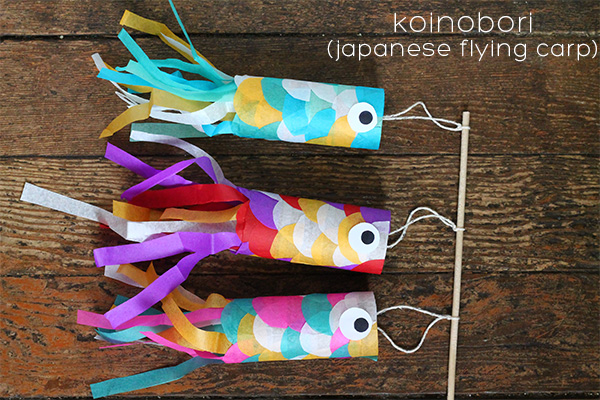
j fish

1. Japanese Flying Carp Craft

This is a great summer craft project for kick-starting a discussion about other cultures, leading to a trip to the library, a new ethnic recipe or a new storybook to read at home. The flying fish are a take-off on a Japanese tradition of flying a wind sock – called a koinobori – on a holiday called Boys’ Day. Google the day for lots of colorful, fun photos that make for great inspiration and a bonus learning experience.

Squirrelly Minds provides step-by-step instructions with helpful (and beautiful) photos to go along with them.

For the Japanese Fish (via Squirrelly Minds) you will need:

3 empty toilet paper rolls

Double-sided tape (or a glue gun)

Tissue paper

White paper

A small dowel

Scissors

Twine
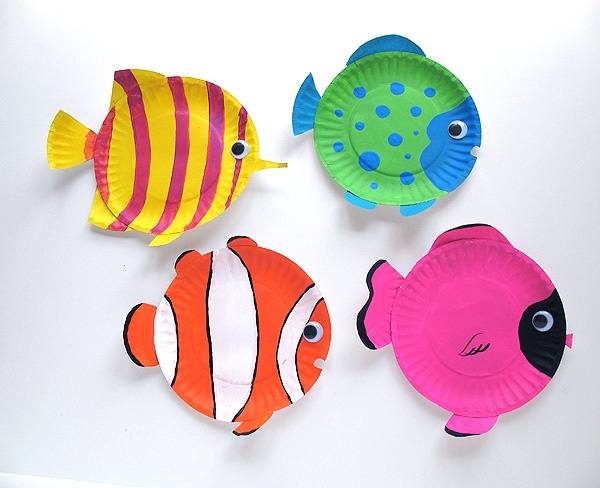
tropical fish craft

2. Tropical Fish Craft for Preschoolers

These bright, colorful fish make for a great summer craft for kids on the younger side who can simply paint paper plates and paste on fins, tails and google eyes. It’s a great summer craft for preschoolers or early elementary kids, who can take it a step further by adding more detailed designs and embellishments to their fish.

For the Tropical Fish (via Make and Takes) you will need:

8 miniature paper plates

Brightly colored paints

Paintbrush

4 large wiggle eyes

White craft glue

Glue stick

Scissors

Bigger kids (and parents or sitters who need a hand) can use these printable patterns for creating more realistic, detailed fish (include fins, tails and stripes and spots): pattern 1 and pattern 2.

pet rock monsters craft

3. Pet Rock Monsters Craft

Who among us hasn’t taken on a pet rock or two? Kids love pet rocks and this easy tutorial helps to turn plain ol’ pebbles into googly-eyed, colorful monsters – scary or silly. Let your child’s imagination run wild to create their own creatures. Wouldn’t this make a fun summer craft to tackle after watching the Monsters University movie?

The how-to is simple: Paint them all over and leave them to dry thoroughly. Then paint on details and glue on the goggle eyes to make them come alive.

For the Pet Rock Monsters (via Cocoa Bean) you’ll need:

An assortment of hand-sized rocks or pebbles

Paints

Small paintbrushes

A Sharpie

Glue

Google-eyes
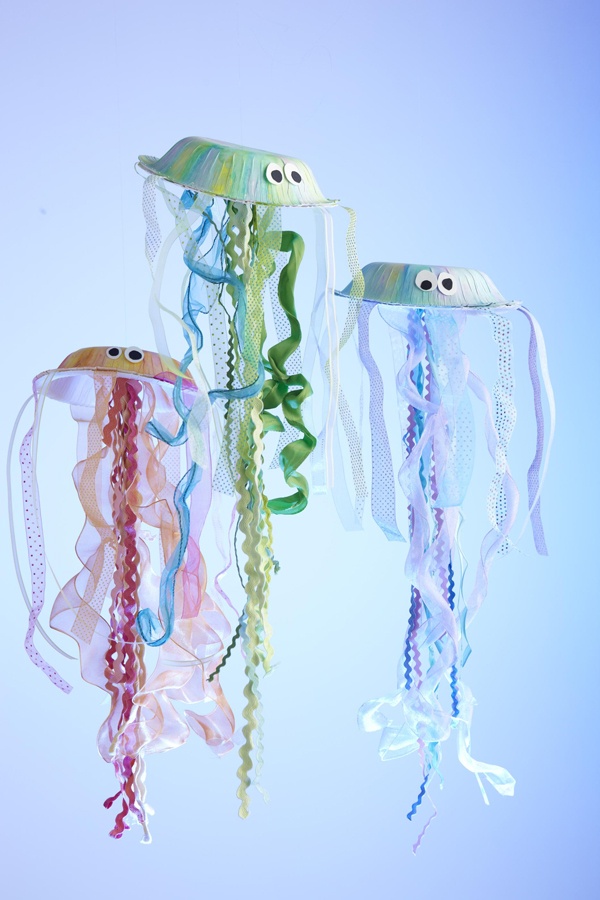
jellyfish craft

4. Jellyfish Craft for Kids

These cute jellyfish would be great to hang from a ceiling in your child’s bedroom or playroom. The instructions are simple:

▪       Paint the outside of two paper bowls.

▪       Trim eyes from cardstock or draw the eyes with markers.

▪       On the inside of the bowl, add liquid adhesive and place the ends of ribbon in it. Place another bowl on top (with the ribbon sticking out) and let it dry.

▪       Poke two small holes in the center of the bowl. Thread fishing line through the bowl so it creates a loop under the bowl.

▪       Tie ribbon and trim to the loop, then tighten the loop to secure the ribbon.

For this Jellyfish summer craft, you will need:

Paper bowls

Watercolor paints

Cardstock (for the eyes. Or simply draw them on with a Sharpee)

Liquid adhesive or glue

Ribbon

Fishing line

Love these fun summer craft ideas, but you just aren’t the crafty type? UrbanSitter has lots of babysitters who’d love to get busy crafting with your kids.

Get Busy with Spring Break Crafts for Kids

Yarn Eggs by Mod Podge Rocks

The kids are home for Spring Break, and chances are you could use a few craft ideas for entertaining them. Here are 5 Spring Break arts and crafts that are sure to keep them busy!

1. Yarn Eggs

Our first Spring Break craft idea from Mod Podge Rocks could pass as an Easter-time craft, but really it works any time of year. It’s a fun project for school-age kids who will love the process and the end result – big, colorful orbs to hang in their rooms. You’ll need thin cotton yarn, balloons, craft glue, newspaper, waxed paper, a clothespin and a hanger. The project involves making a watered-down glue mixture, dipping strands of yarn in it and and wrapping around a balloon. Once dry, you pop and remove the balloon, and you are left with a funky, colorful egg.

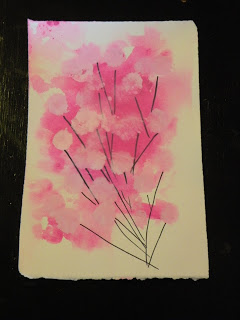
2. Spring Blossom Painting

The blogger from Toddler Approved created the idea for this gorgeous painting that is worthy of hanging on a prime spot on your walls. Check out her handy tutorial for a detailed how-to that includes photos of each step. Be assured that it’s a simple project involving materials you likely already have in the house, which is perfect for crafts for Spring Break… watercolor paper, paint and a Sharpie is all you need!

Blossom Painting by Toddler Approved

3. Chalkboard Flower Pots

We’ve tweaked this Spring Break craft a bit to make it more kid- friendly.  The day before you tackle this project with the kids, paint a few flower pots with chalkboard paint. The ingenious paint now comes in nearly every color of the rainbow.  Once dry, big kids they may enjoy embellishing the pots with trim, ribbon or buttons (similar to the project shown here). Kids of all ages will love using the colorful pots to plant a few fast-growing seeds or actual flowers or plants you’ve picked up from the home improvement store or local nursery, and then decorating their pots with chalk drawings that can be erased at whim.

Chalkboard Flower Pots by Paint Me Plaid

4. Button Flowers for Counting

This cute craft helps young kids count and learn to associate numbers. It’s simple, too.  Help kids use green Wikki Stix  (wax covered yarn sticks you can bend and mold to any shape) to make stems and leaves for flowers and attach to a piece of white paper.  Children can then attach a button to the top of the stem (the Wikki Stix will adhere the button so no glue is necessary). Label the stems of the flowers with any numbers the children are working on.  Have the children place the corresponding number of buttons on top of the flowers.

Button Flowers for Counting by Sixty Second Parent

5. Bunny Paper Plate Photo Frame

Here’s a cute Spring Break craft that even the tiniest tots can handle. Simply cut the middle out of a paper plate, paste cotton balls on the remaining circle, and staple two bunny ears made from additional plates and also covered in cotton balls You can either paste it around a photo of your child’s face (like a frame) or tie a string from side-to-side on the back and make a fun mask.

Bunny Love by I Love 1st Grade

Need a break from Spring Break? Find and book babysitters with UrbanSitter. Sign up for free and start searching for babysitters!

Get Crafty with Spring Crafts for Preschoolers

Dare we say it for fear of jinxing ourselves? Spring is almost here! Despite the cold weather most of the country is still fighting, Spring is officially only weeks away. Let’s mark its long-awaiting arrival with some fun, simple crafts for parents or sitters to tackle with preschoolers who will love creating these adorable bunnies, chicks, flowers, Easter eggs and rainbows.


Spring Crafts for Preschoolers

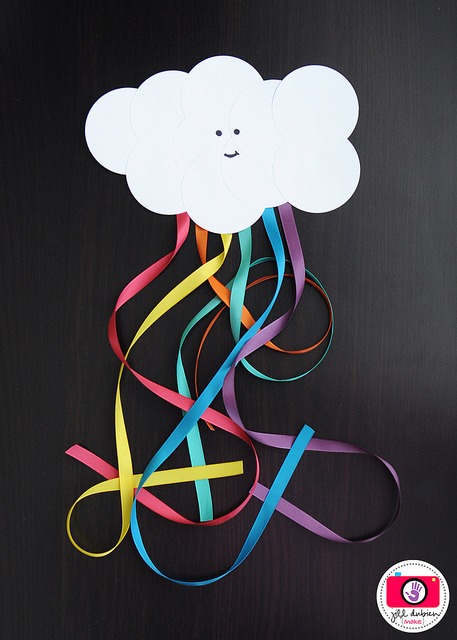
Happy Cloud and Rainbow
Spring showers often bring rainbows – create your own with curly ribbon. Instructions via Meet the Dubiens.

via Meet the Dubiens


Shaving Cream Easter Egg
Promised to be far less messy than it appears, this craft is pure tactile fun for little hands! Instructions via Little Wonders’ Day.

via Little Wonders' Day
via Little Wonders’ Day

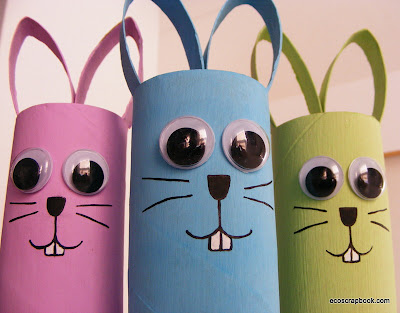
Toilet Paper Roll Bunny
It’s always nice to pull art supplies from the recycling bins, and who doesn’t love a project with googly eyes!? Little ones will need some extra assistance gluing tiny pieces and drawing the bunny face. Instructions via Eco Scrapbook.

via Eco Scrapbook
via Eco Scrapbook

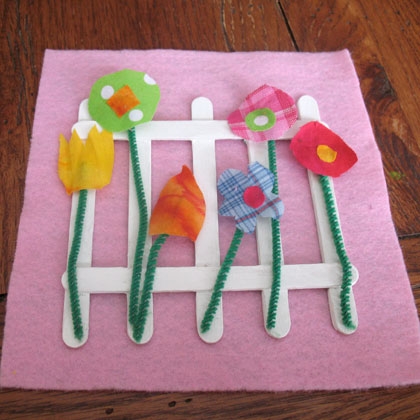
Fabric Scrap Garden
An adorable garden made from scrap fabric, pipe cleaners and popsicle sticks. This one looks cute as a wall hanging. Instructions via Spoonful.

via Spoonful
via Spoonful

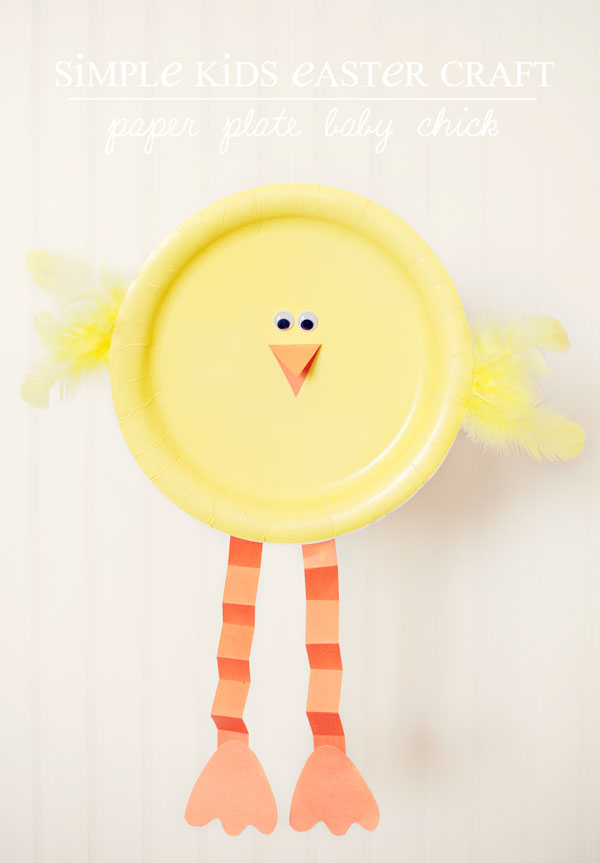
Paper Plate Chick
Super simple, super cute craft for little ones. Instructions via Simple as That.

via Simple as That
via Simple as That

For more great ideas for creating fun art and crafts with kids, check out UrbanSitter’s Pinterest Board – Crafts for Kids. 

Valentine’s Day Crafts for Kids

How about arming your babysitter with Valentine’s Day craft ideas and supplies for your kids to create special treats for family and friends? You’ll have happily occupied kids, a grateful babysitter and a few special gifts, too.

Here are five sweet ideas for your little ones to get crafty:

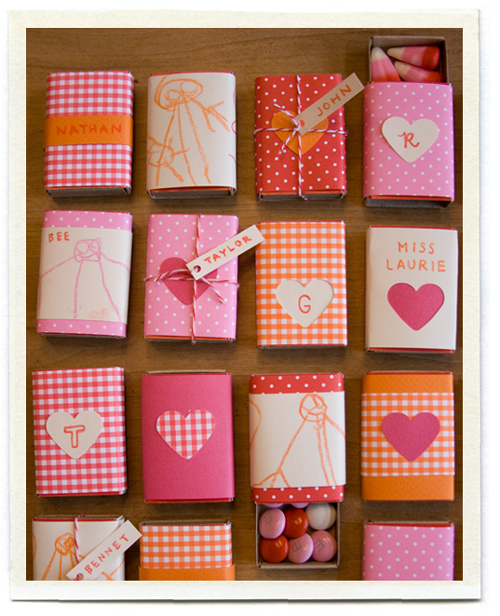
1) Fun Craft for Bigger Kids – Matchbox Valentine Boxes

matchbox valentines by inchmark.squarespace.com

Kids love tiny things, and who can blame them? These tiny packages made out of matchboxes and filled with candy are adorable. (You’ll want one, too!) Easy to create, the boxes can be customized with as much or as little as your crafter likes. Tape a strip of craft paper to cover them [Cut a piece of paper 2″ high (or the height of your matchbox) and about 4″ long (enough to wrap it around)], slap on some stickers, or paint or draw your own decorations… and tie with a bow. Since they are so teeny, a bag of candy is all you’ll need to fill a whole slew of them. M&Ms work well, and you can buy the pink and red ones for VDay.

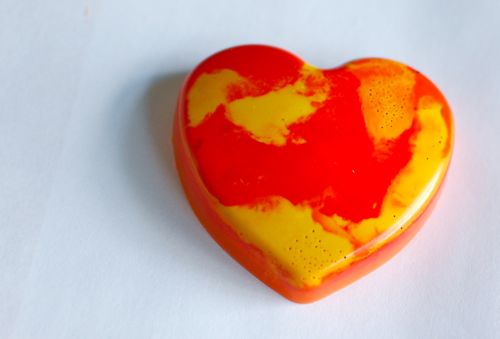
2) Homemade Valentine’s Day Cards with Crazy Crayons

crazycrayons by innerchildfun.com

We love this crazy cute Valentine, particularly because it includes a kid-approved treat that isn’t candy – Crazy Crayons. Here’s the perfect use of all the bits and pieces of broken crayons you undoubtedly have at the bottom of your arts and crafts box. Crazy Crayons take what’s old and turn it into colorful, useful, Valentine gifts for classmates and friends. Your kids will love the crayon “demo” and the big reveal (once the bits bake at 425 degrees for 10 minutes, then chill in the frig). A heart muffin tin is especially cute to use, and these free printables stapled to the top of a Ziploc bag make the Valentine especially easy to package.

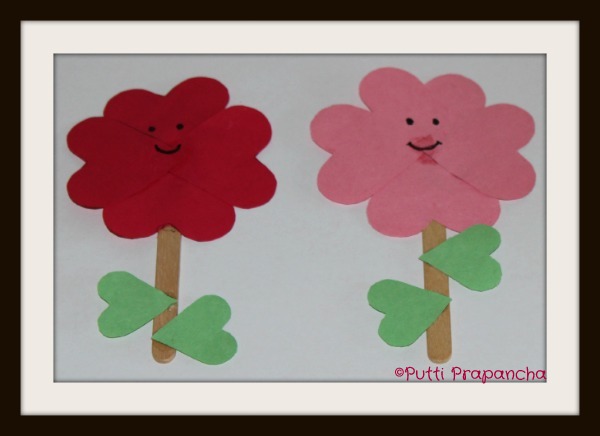
3) The Perfect Project for Preschoolers – Heart Flowers

Photo by Puttisworld

You’ll need red, pink and green construction paper, craft or popsicle sticks, glue, scissors and a couple of markers to create these happy Heart Flowers. Your sitter can help by cutting out four red/pink hearts for the flower and two smaller green hearts for the leaves of each flower. Your child can glue them to the paper, overlapping to form a flower, adding the stick for a stem and leaves, too. Once dry, draw a face and any Valentine’s Day message you choose. Instructions and photos here, thanks to Putti’s World.

4) Get Cooking for a Tasty Snack (or Gift)

Photo by Workathomegal.com

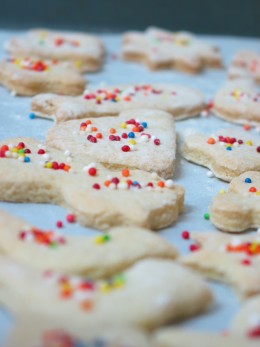
Take it easy on your sitter by leaving her all the trappings for a low-fuss treat she and the kids can bake and decorate. Depending on your child’s age and familiarity with baking, choose either a roll of refrigerated cookie dough, a boxed mix for cupcakes, or the easiest route – premade, undecorated cookies or cupcakes from the bakery or grocery store. Most will agree the best part of baking holiday treats is decorating them, so go all out on decorations. You could include several colors of candy sprinkles or sugars, maraschino cherries, dried coconut, tubes of frosting, chocolate chips, and candy hearts.

5) Homemade Decorations to Cherish Year After Year

Photo by Kaboose

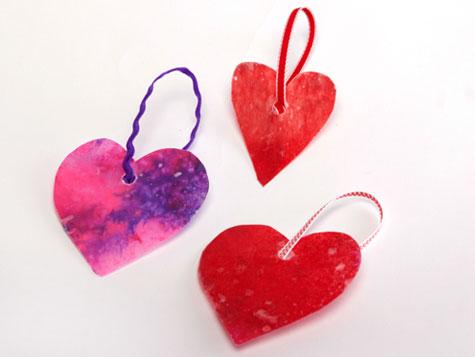
We know, we know, it’s another craft with crayons, but we couldn’t help ourselves. This craft is worth picking up an extra set of crayons so you can tackle it, as well as the melted crayon Valentines. So pretty to hang in a window, these stained glass hearts are a perfect way to brighten dreary winter days. You can make them by melting crayon shavings between waxed paper using an iron set on low. Hang them with a loop of string or ribbon after cutting out hearts. Experiment with different color combinations, and make sure the sitter knows not to take her eyes off the hot iron or melted paper until they have cooled.

Hope you, your kids and your sitter love these Valentine’s Day Crafts for Kids as much as we do!

7 Fall Crafts for Preschoolers

fall crafts for preschoolers

Celebrate fall by making these 7 fall crafts for preschoolers! With kids going back to school and Halloween coming up, there’s a lot happening this season.

Leaf hedgehog fall craft for preschoolers

1. Leaf Hedgehogs

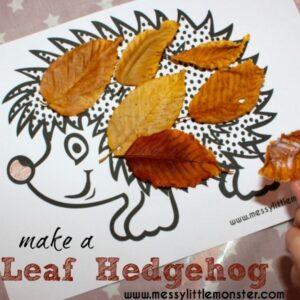
Decorating leaf hedgehogs is a fun way to celebrate the leaves changing and explore outside with your kids. The best part is that every kid’s hedgehog will look unique! Messy Little Monster has a printable hedgehog image that doubles as a guide for the leaves and a coloring sheet.

For this Leaf Hedgehogs fall craft you’ll need:

  • Hedgehog printable
  • Leaves
  • Glue
  • Brown crayon, marker, or colored pencil
Easy apple tree fall craft for preschool kids

2. Easy Apple Trees For Preschoolers

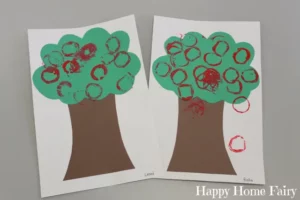
Making these apple trees with construction paper and toilet paper rolls is simple and fun! This craft can be a way to discuss how apples grow or even the legend of Johnny Appleseed to your children. After creating a tree with construction paper, children can decorate their trees with apples made by stamping toilet paper rolls in red paint.

For these Easy Apple Trees (via Happy Home Fairy) you’ll need:

  • Green, white, and brown construction paper
  • Glue
  • Red paint
  • Toilet paper roll
Leaf rubbings

3. Leaf Rubbings Fall Craft

Leaf rubbings are a classic outdoor craft for fall in preschool and beyond! Your kids can experiment with different colors and shapes of leaves to create their own unique art piece with lots of interesting textures.

For the Leaf Rubbings (via National Nordic Museum) you’ll need:

  • Leaves
  • Paper
  • Crayons
Scarecrow paper bag puppet fall crafts for preschoolers

4. Paper Bag Scarecrow Puppets

This fall craft is fun for both preschool kids and older kids, plus kids make their own toys to play with. More advanced crafters can build their own scarecrow puppets using paper bags. Simple Everyday Mom has a printable template with lots of pieces they can use to decorate their scarecrow, or kids can freestyle and design their fall-themed puppet however they’d like. 

For the Paper Bag Scarecrow Puppets you’ll need:

  • Brown paper bag
  • Colored cardstock or construction paper
  • Glue stick
  • Scissors
  • Black marker
  • Scarecrow template
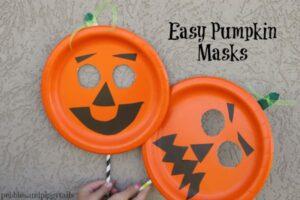
Paper plate pumpkin mask

5. Paper Plate Pumpkin Masks

This fall craft uses items you already have at home and is a great way to get preschoolers excited about dressing up for Halloween! One Creative Mommy has step-by-step instructions and photos to lead you through this craft. 

For the Paper Plate Pumpkin Masks you’ll need:

  • Orange paper plates
  • Adhesive craft vinyl or black construction paper
  • 1 straw or stick
  • 1 popsicle stick
  • Milk jug lid or other shapes for eyes
  • Scissors or razor
  • Marker or pencil
  • Tape or glue
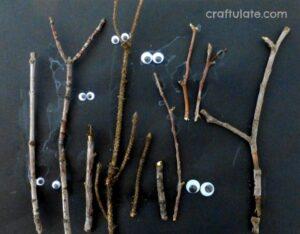
Spooky forest craft

6. Spooky Forest Fall Craft

This craft is fun, a little spooky, and handy for family time outside. Gather twigs in your backyard or on a local nature walk, then glue them onto a piece of black construction paper and add googly eyes to create your own spooky forest. 

For the Spooky Forest (via Craftulate) you’ll need:

  • Twigs
  • Googly eyes
  • Black construction paper
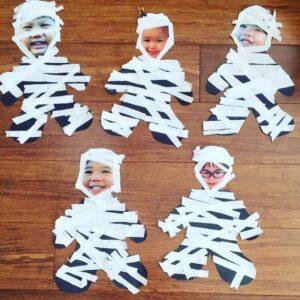
Mummy kids fall craft for preschoolers

7. Mummy Kids

Help kids transform themselves into spooky, scary mummies! This craft is easy enough for preschoolers and perfect to get them excited about Halloween. The instructions are simple:

  1. Cut out a body shape from black construction paper, using a gingerbread cookie cutter as a stencil if needed.
  2. Cut out your child’s head from a photo and tape it to the paper body.
  3. Use masking tape to “wrap up” the paper body.

For the Mummy Kids (via One Child) you’ll need:

  • Scissors
  • Black construction paper
  • Masking tape
  • Photo of child
  • Gingerbread cookie cutter (optional)


Looking for more ways to celebrate fall with your children? Check out our favorite fall activities and delicious one-pot dinners that are perfect for fall!

Busy with back to school?

Sign up for UrbanSitter, the easiest way to find and book babysitters!

4 Fun Holiday Projects that Make Great Gifts from Kids

sock snowmen

Hopefully you’ve taken advantage of UrbanSitter to score a sitter or two so you can get out to enjoy a holiday party or take care of some shopping without the kids. Why not make it fun for the kids and a little easier on the sitter by leaving them with instructions and supplies for holiday crafts to tackle together?

We’ve selected four crafts that will score big points with kids and are simple enough as to not to stress out the sitter. What’s even better? These crafts make awesome homemade gifts. Your kids will love wrapping their masterpiece and will beam with pride when they deliver it to a lucky recipient this holiday season.

Our top four, fun-to-make, homemade gifts, along with instructions and a handy shopping list for each:

  1. 1. Salt Dough Hand Print Ornament

Those tiny hands, whether they belong to your newborn or your 7-year-old, won’t last for long. These classic handprint ornaments made with salt dough are an adorable, touching way to cement a moment in time.  You’ll cherish them so much, you won’t want to give them away… so have the sitter and your kids make one for you, too.  Click for instructions.

Here’s what you’ll need to leave the sitter:

4 cups of flour

1 cup salt

Food coloring

Large Mixing Bowl

Cookie sheet

Canola oil

Small rolling pin

Drinking straw

Ribbon

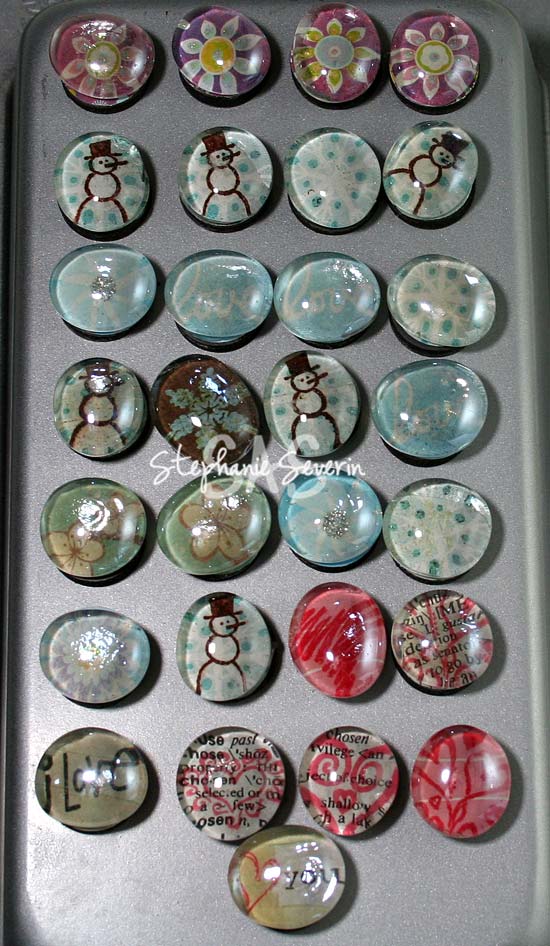
Photo by Stephanie Severin

2. Magnified Magnets

This is a good project for bigger kids who have better focus and dexterity than their younger  siblings. Half the fun of the project is hunting down tiny pictures to fit on the back of glass pebbles. Good places to search for images include: scraps of wrapping paper, Christmas cards, homemade drawings, and thumbprints made with a stamp pad. Simply cut out the image and glue it right side up to the flat side of a glass pebble. Once dry, glue a magnet to the back of it. The blogger gives you more detailed instructions, and lots of photo for inspiration.

You’ll need the following, available from a craft supply store:

3/4 inch circle punch

Glass accent marbles/pebbles

Adhesive

Stamp pad

Craft paper, wrapping paper, cards

¾ inch magnets

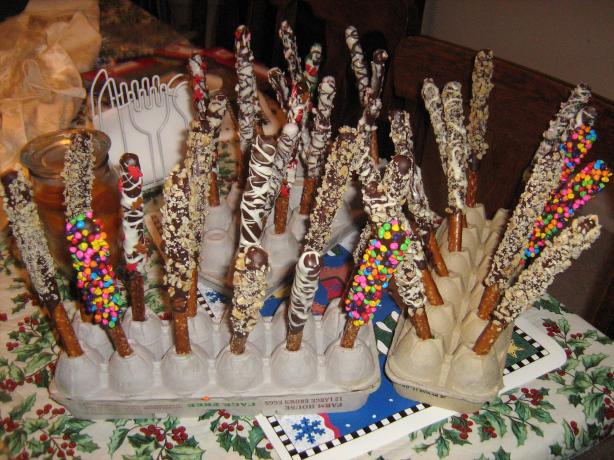
3. Chocolate-Dipped Pretzels

pretzels
Photo by: food.com/938006

This is a yummy cooking project for kids of various ages.  Everyone can help break up the chocolate; older kids, with the help of a sitter, can dip the pretzels into melted chocolate (candy canes work well for dipping, too); and little ones can sprinkle and/or roll pretzels in crushed candy, sprinkles, nuts or coconut. There is no shortage of recipes for this one, but here’s a favorite of ours.

You’ll need:

Pretzels rods or candy canes

Chocolate chips or melting chips

Candy, sprinkles, nuts, coconut – anything you want to roll them in

Wax paper for cooling pretzels

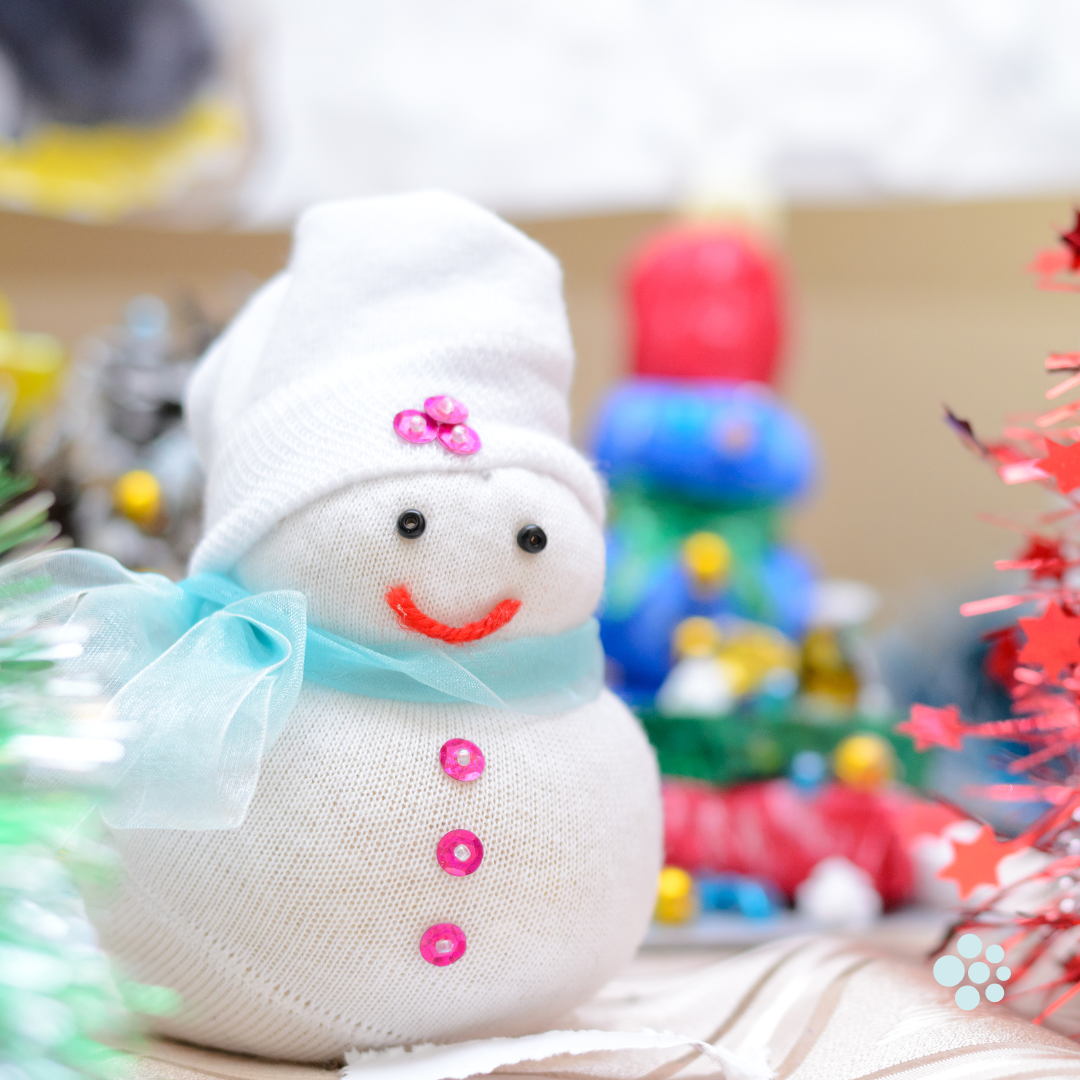
4. Sock Snowmen

sock snowmanThis adorable craft is perfect for kids and a great way to repurpose those lonely socks missing their match. 🧦 These no-sew snowmen are as fun to make as they are to display, and they make a fantastic holiday gift or decoration.

Simply fill a white sock with rice, tie it off to form the body and head, and then decorate with buttons, fabric scraps, and markers to create a snowman full of personality. It’s a mess-free, kid-friendly craft that doesn’t require glue or advanced crafting skills.

You’ll need:

  • White socks
  • Rice (or stuffing material)
  • Rubber bands
  • Fabric scraps or ribbon
  • Buttons
  • Markers

For full instructions, check out this guide.

Have you found other holiday crafts for kids that your kids are going ga-ga for? We’d love to hear about them. Please share with us!

Cool Summer Activities for Preschoolers on Hot Summer Days

toddler summer activities, preschooler water play

Summer is chock full of opportunities for entertaining and enriching little kids’  development through new experiences and activities. Need some ideas for summer activities for preschoolers? Check out these ideas for summer activities for the 3-5 year-old set. They’ll come in especially handy during the dog days of summer, headed our way. 

1.  No-Stress, No Mess Water Play

Take advantage of a sunny day (or even a rainy one, provided there’s no thunder or lightning) to set your kids loose outdoors and let them burn some energy doing what all kids love to do as a summer activity – play with water. Fear not, city dwellers, simply set a big plastic container filled with water on whatever outside space you have and arm your tikes with any of the following, all which make for great water play for little hands:

Summer Activities for Keeping Preschoolers
Ice Cube Boat via Alpha Mom
  • Small plastic fish or animals
  • Barbie or Polly Pockets dolls
  • Sponges and a wash cloths
  • Small paint brushes for “painting” the sidewalk
  • Matchbox cars for washing
  • Boats – make your own Ice Cube Boats with nothing more than an ice cube molded in a plastic cup set with a drinking straw and flag for a sail.  These boats are adorable, and perfect for hot days.
  • Plastic cups for pouring and filling
  • A watering can for watering plants
  • A garden hose
  • Pull out the inflatable pool and let them splash for hours.

2. Easy DIY Crafts Just for Kids

Every kid needs a creative outlet, not to mention a quiet, inside activity once in awhile. We’ve found loads of great summer crafts for kids of all ages, some that can be made in minutes and others that will occupy a preschooler for the full duration of his baby sibling’s nap. Check out our Summer Crafts for Kids Pinterest board for ideas, including these adorable and easy-to-make Flowers.

3. Explore a Good Book

Be sure to save time in your summer schedule for the simple pleasure of reading with and teaching your preschooler skills that will help him learn to read.  You can encourage preschoolers to spend time with books by having them join older siblings in a summer reading program, whether it be one from a local library, Scholastic or a homemade incentive program. Encourage any form of reading, including pre-reading activities, like tracing or practicing their ABCs; “reading” to you or a sibling; or having a summer ritual of reading  together as a family, perhaps a chapter of an endearing family-friendly favorite like Make Way for Ducklings, by Robert McCloskey, before bed. Scholastic has a helpful list of book recommendations for kids of all ages, including good picks for 3-5 year olds.

4. Get Your Groove On!

Another good hot summer activity is getting your groove on. Turn a playdate into a musical instrument making extravaganza (hint, hint, call in a babysitter to help!) and create the neighborhood’s next musical sensation. Check out Meaningful Mama’s fantastic list of 20 DIY Musical Instruments for Kids and see how simple and easy it can be to make anything from a bottle-cap tambourine to a full-on drum set.

Summer Activities for Keeping Preschoolers
DIY Musical Instruments via Meaningful Mama

5. Master a New Skill (and give Mom and Dad a helping hand!)

Teaching kids new skills helps develop their independence and shows them that they are an important, contributing member of their family… and eventually of the bigger world. Early childhood education experts recommend building skills by assigning chores, and believe that most preschoolers are capable of any of the following simple “taking care of myself and my house” chores:

  • Setting and clearing their place at the table
  • Making their bed
  • Sorting their clothes from the dryer
  • Picking up and putting away toys and art supplies.

See our handy guide to age-appropriate chores for kids for more ideas.

After all the fun with these summer activities for preschoolers you might need a parents night out. Book an UrbanSitter and leave the entertaining to the sitter!

The Best Christmas Crafts for Kids: Top 5 Picks

Christmas crafts for kids

There’s no better way to add a sprinkle of festive joy to your home than with Christmas crafts for kids. If you’re searching for easy and delightful holiday crafts for kids, Christmas paper crafts, or preschool Christmas crafts, you’re in the right place. These projects will not only keep your little ones entertained but also add a dash of seasonal cheer to your home. 

holiday crafts for kids


1. Felt Christmas Ornaments

Let your child’s creativity shine with felt Christmas tree decorations. Cut out various shapes and let your kids design ornaments using felt, buttons, sequins, and ribbon. Hang them on the tree or give them as personalized gifts to family and friends.

For this easy felt ornament (via One Creative Mommy), you’ll need the following:

  • Assorted colored felt sheets
  • Jute, twine, or ribbon
  • Small sticks
  • Scissors
  • Glue
  • Buttons, sequins, and ribbon
festive paper plate wreath

2. Festive Paper Plate Wreath

Gather some green paper plates, colored paper, and glue. Cut holly leaves, berries, and a bowtie from the colored paper. Then, have your child glue them onto the paper plate. Hang it up on your door to welcome guests with a warm, festive greeting. Kinder Craze has step-by-step instructions and photos to lead you through this craft. 

For these festive paper plate wreaths, you’ll need:

  • Paper plates
  • Green tissue paper
  • Scissors
  • Red Pom Poms
  • Red Cardstock Paper
  • Glue
  • Marker/Pencil
  • Stapler
cardboard tube snowmen

3. Cardboard Tube Snowman

Don’t throw away those cardboard tubes! They can be transformed into these adorable snowmen Christmas crafts for kids. Paint the tubes white and decorate with buttons, construction paper, and a tiny scarf. These little snowmen are a great way to upcycle and craft the perfect holiday project for kids.

For these cardboard snowmen crafts (via Emma Owl), you’ll need:

  • Cardboard tubes
  • White wool, string, or twine
  • Googly eyes
  • Orange foam or cardboard
  • Buttons 
  • Marker 
  • Sticks
  • Pipe cleaner and pom-poms.
  • Glue 
preschool christmas crafts

4.Santa’s Reindeer Handprint

In search of fun preschool Christmas crafts? Look no further. Help your child paint their hand with brown paint and stamp it on paper. Add a red nose and googly eyes, and you’ve got a cute reindeer. It’s a fun way to create holiday memories with your little ones.

For the hand-print reindeer (via Simple Everyday Mom) you’ll need:

christmas paper crafts

5. Sparkling Snowflakes

Create your own winter wonderland with these sparkling snowflake Christmas crafts for kids. All you need are some white pipe cleaners, beads, and a little imagination. Have your child thread the beads onto the pipe cleaners, shape them into snowflakes, and voilà, you’ve got some beautiful Christmas paper crafts!

For this snowflake craft (via Toddler Approved) you’ll need:

  • Popsicle sticks
  • Hot glue gun
  • White glue
  • Sequins, buttons, glitter, or jewels
  • Dot Markers

Looking for more ways to celebrate the holidays with your children? Check out our post on Festive Kids’ Crafts That Are Good Enough to Eat. Now, roll up your sleeves, gather your craft supplies, and let the holiday fun begin!

Crafty Kids: 3D Origami Spider for Halloween!

Origami spider

By Stephanie Martyn

Spiders don’t always have to be creepy! This sweet-looking barnyard arachnid will get lots of friendly pats if you leave him lying around the house when the trick-or-treaters come through.

When complete, this project lies horizontal. Construction starts at the head of the spider, which you’ll see at the bottom of the diagram. You’ll notice the pieces that stick out from the diagram: those are the legs of the spider. These pieces don’t need to be constructed until the main body is completed. Each leg has 3 origami pieces.

What you’ll need:
84 pieces of “Size B” black paper, folded according to the instructions below
All-purpose glue
Scissors
White paper for eyes
Black marker
Hot glue gun
Yellow Paper for mouth

Key:
Upside-down V: Rough side facing upward (structure lies horizontally)
Star symbol:  Placement of eyes

To start, fold the black paper into V’s like this (yes, there are a lot of steps, but they’re easy, we promise!):

1. Take a piece of paper and fold it in half the long way.

2. From here on out, it’s important that the opening to this folded piece is facing down. Fold down the middle the short way to make a crease, then unfold.

3. Fold down half the piece at an angle (on both sides of the crease) so that the folded edge lines up to the crease in the middle. Be sure not to overlap these folds.

4. Flip the piece over.

5. Fold the bottom right corner up diagonally.

6. Repeat symmetrically on the other side. Be sure not to overlap onto the top half, otherwise the pockets won’t turn out properly.

7. Fold one bottom triangle upward.

8. Fold the other bottom triangle upward so the whole piece now looks like a triangle.

9. Fold across the middle. (Flaps should be on the inside of the triangle.) Ta-da! Your 3D origami piece is complete.

10. These are the “pockets” for constructing. This is where the “points” will be inserted.

11. This is the “smooth side” of a 3D origami piece. It’s shown by a in the diagrams for each project.

ORIGAMIPIECEM.jpg

12. This is the “rough side” of a 3D origami piece. It’s shown by a V in the diagrams for each project.

Now, start constructing at the head of the Spider.

1. Your first row will have 3 pieces. Start by holding 2 black folded pieces next to each other with their points up and rough side facing you. With a third piece, hold it in the same direction and insert its pockets into the middle points of the first 2 pieces. This should join the first 2 pieces. Glue as you go.

2. You have 3 pieces attached to one another, which makes up part of row 1 and 2 of the diagram. To construct off of this, take another black folded piece and hold it right next to the 2 pieces from row 1. Use another black folded piece and insert it into row 2. This piece’s pockets will be inserted into the points of row 1, thus joining the pieces of that row. You should now have 3 pieces in row 1, and 2 pieces in row 2. Keep gluing!

3. Continue building and following the diagram. On all rows with 6 pieces across, the outer pieces must be inserted with the point into the inner pocket of that piece. This is so part of the folded piece will hang out from the body and you will have something to construct the legs off of.

4. Construct each leg by taking 3 folded pieces and inserting them directly into one another’s pockets (2 points of a piece will be inserted into the 2 pockets of another).

5. The legs will attach to the body at the 8 areas where the flaps are hanging out. Remember to glue!

6. Cut 2 small circles out of white paper and use a black marker to color a smaller circle in the middle. Hot glue the eyes to the structure.

7. Finally, cut the mouth out of yellow paper and hot glue it under the eyes.

9. He’s ready to crawl away!

Excerpted from 3D Origami Fun!: 25 Fantastic, Foldable Paper Projects by Stephanie Martyn. Copyright © F+W. Used by permission of the publisher. All rights reserved. Photography by Stephanie Martyn and Elisabeth Lariviere.

7 Simple Kid’s Crafts for Mother’s Day

Mother's Day Art, Simple Art Projects for Mother's Day, Mom Art

Why not surprise a mom by helping her kids create a heartfelt, homemade gift to show their love this Mother’s Day? Roll up your sleeves, gather the supplies, and let the crafting begin! Here are 7 simple DIY gifts kids can create with a little help from you to make any mom feel special:

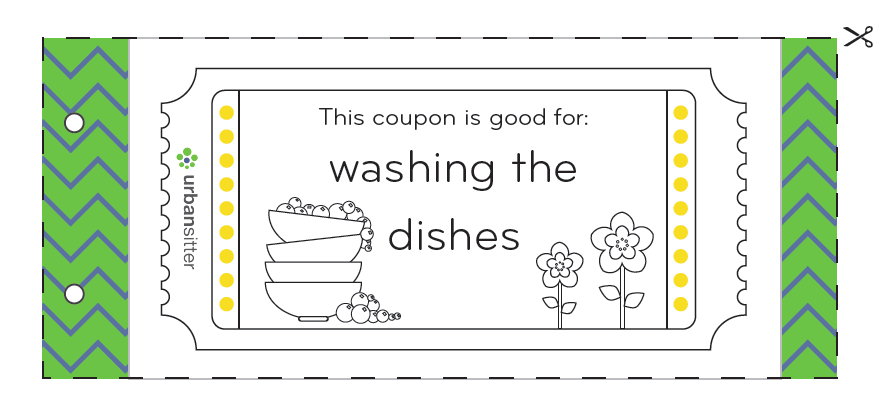
1. Mother’s Day Coupon Book

Download our Mother’s Day Coupon Book printable template to make an extra-thoughtful gift mom with coupons for “washing the dishes,” “folding the laundry,” and even “one hour of quiet time.” Have your little one color in and draw on each coupon to personalize it. Complement your coupon book with an UrbanSitter gift card!

mother's-day-coupon-book

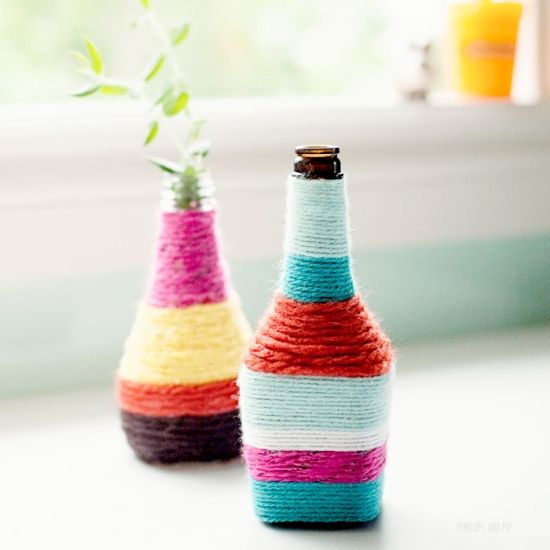
2. Yarn Wrapped Bottles

Older kids can dive into a fun (and sustainable!) art project by creating yarn-wrapped vases for Mom. All you need are empty bottles, colorful yarn, and a pair of scissors. These beautiful vases are an easy and charming way to present a few flowers on her big day. 

  • Gather your supplies: Empty bottles, colorful yarn, scissors, glue.
  • Prep the bottles: Remove labels and clean thoroughly.
  • Start wrapping: Tie a knot at the top and start wrapping, securing with knots or glue.
  • Switch colors: Experiment with different yarn colors for a vibrant look.
  • Finish it off: Tie a knot at the end, trim excess yarn, and tuck loose ends.
via Huffington Post
via Huffington Post

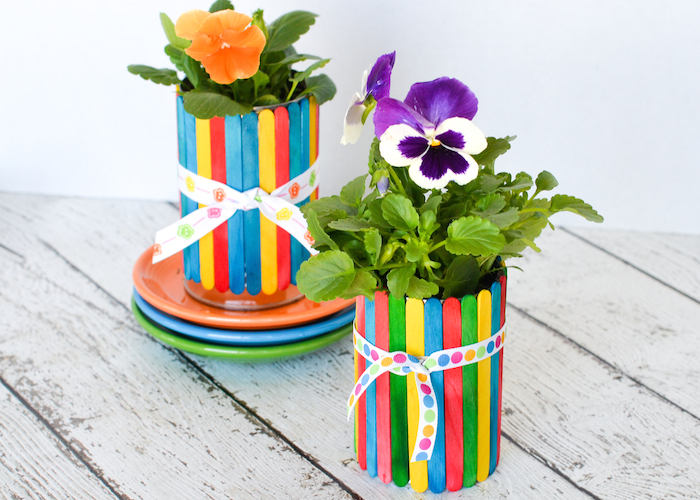
3. Craft Stick Flower Pot

Another fun, easy craft for kids to do on Mother’s Day is to create a colorful flower pot. Find a recycled can or other small container, craft or popsicle sticks, and some glue. After the flower pot is finished, fill it with her favorite plant for a long-lasting gift that will keep her smiling.

  • Gather your supplies: Recycled can or container, craft sticks, glue, paint (optional), favorite plant.
  • Prep the container: Ensure it’s clean and dry.
  • Create the base: Glue craft sticks around the container.
  • Decorate: Add colors, drawings, or stickers for a personalized touch.
  • Fill it up: Fill the pot with Mom’s favorite plant once dry.
via Somewhat Simple
via Somewhat Simple

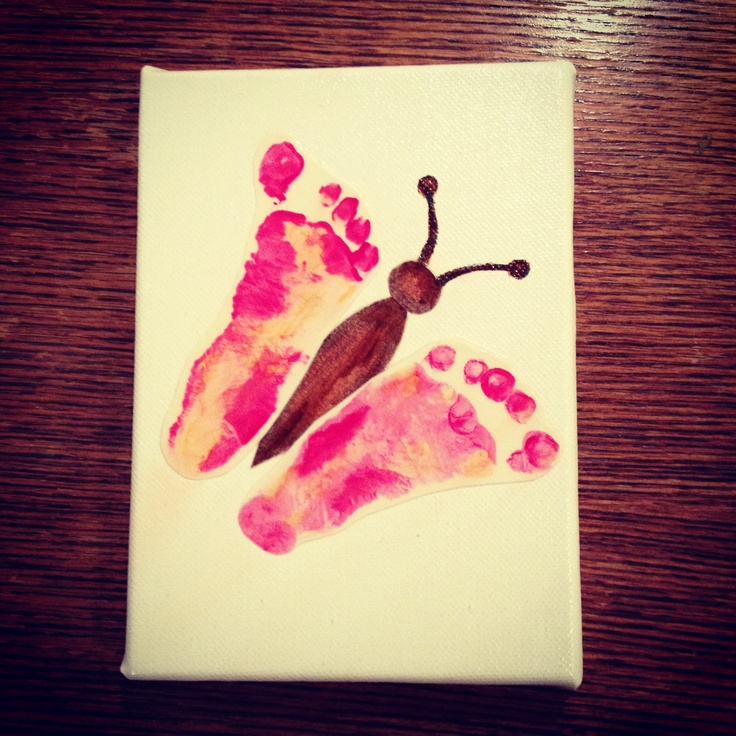
4. Baby Feet Butterflies

If you’re looking for an easy art project for Mother’s Day for a baby, using their fingerprints or footprints is a wonderful way to create sentimental art. One homemade gift for mom from a baby is to dip the baby’s feet into non-toxic washable paint and create footprints. After the paint has dried, turn them into butterflies with just a few swipes with a marker.

  • Gather your supplies: Non-toxic, washable paint, paper, and marker.
  • Dip and print: Dip baby’s feet in paint and make footprints on the paper.
  • Let it dry: Allow the paint to dry completely.
  • Add details: Turn footprints into butterflies with marker strokes.
  • Personalize: Write a message or date for an extra personal touch.
via Pinterest
via Pinterest

5. Tissue Paper Flowers

Truly a classic and perfect Mother’s Day craft for toddlers! Who doesn’t love a few tissue paper flowers, and even more so if they were created by the little ones they love. WikiHow tells you how to make them three ways. Gather the tissue paper, follow a few easy steps, and let the kids create a bouquet of love that Mom will adore.

  • Gather your supplies: Tissue paper, scissors, pipe cleaners.
  • Stack and fold: Stack several layers of tissue paper and fold accordion-style.
  • Secure in the middle: Use a pipe cleaner to secure the folded tissue paper in the middle.
  • Trim the edges: Round the edges or cut them into desired shapes.
  • Fan out petals: Carefully separate the layers to create a full bloom.
via Rust and Sunshine

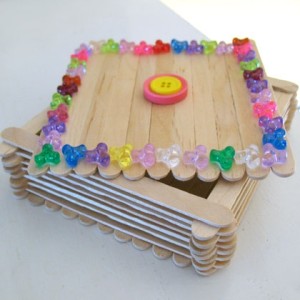
6. Craft Stick Jewelry Box

For the elementary kids, a simple Mother’s Day craft is this beautiful keepsake box. All they need to make this box are craft sticks or recycled popsicle sticks and embellish them with anything from beads, sequins, buttons, drawings, or even stickers. Mom will love storing her treasures here.

  • Gather your supplies: Craft sticks, glue, embellishments (beads, sequins, buttons), and paint (optional).
  • Create the base: Arrange craft sticks to form the base of the box.
  • Build the walls: Glue additional sticks to create walls.
  • Decorate: Add embellishments, drawings, or paint for a personalized touch.
  • Let it dry: Allow the box to dry completely before using or gifting.
via Spoonful
via Spoonful

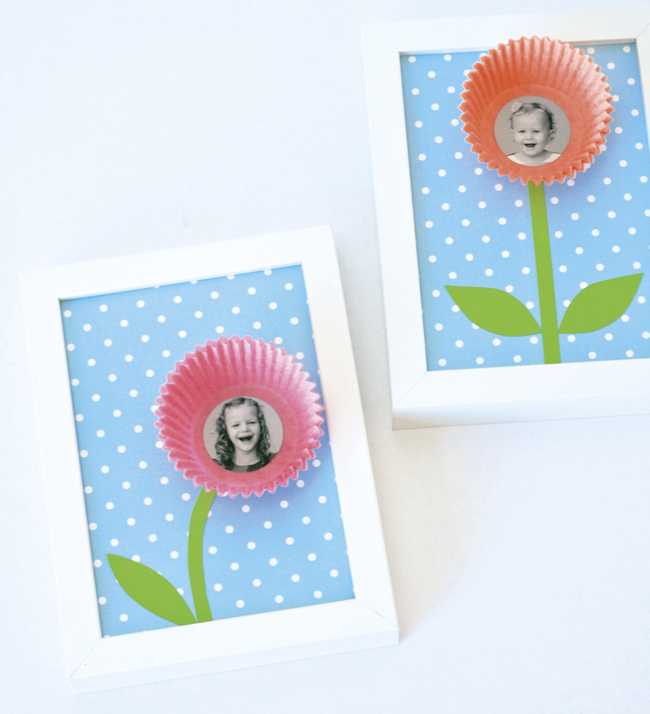
7. Flower Photos

A free printable background, cupcake liners, construction paper, and favorite photos are all it takes to make these adorable flower photos. Photos of children’s faces are cut into 1.5-inch circles and pasted to the center of the flowers.  Once completed, these can be used to make a Mother’s Day card or a picture frame. For a picture frame, either buy a new frame or find an old picture frame and just remove the glass to make room for the 3D flowers.

via Raising Arizona Kids


More Mother’s Day Crafts…

As you delve into the joy of crafting DIY Mother’s Day gifts, why not expand your creative horizons with more crafting ideas? Consider handprint flowers, playful pom-pom projects, endearing handprint hearts, or versatile salt dough creations. Happy crafting, and may your celebration be filled with love and creativity!

Homemade Mother’s Day crafts like these are the ones that will truly touch her heart. She’ll appreciate the time and effort you made to help the kids create such meaningful Mother’s Day crafts. UrbanSitter.com gift cards make great gifts, too!