‍‍50 Hilarious Kids Jokes About School

kids jokes about school

School can sometimes be a serious place with all the learning and studying, but that doesn’t mean we can’t have a good laugh along the way! Here are 50 hilarious jokes that will have your kids giggling in and out of the classroom. These jokes are kid-friendly and guaranteed to generate smiles all around. So, get ready to laugh out loud with these school-themed jokes!

Best kid jokes about school

  1. Why did the math book look sad? Because it had too many problems!
  2. Why did the teacher wear sunglasses to school? Because her students were so bright!
  3. What’s a snake’s favorite subject? HISStory.
  4. Why did the kid cross the playground? To get to the other slide.
  5. How do bees go to school? On a school BUZZ!

Easy jokes kids can tell about school

  1. What’s the smartest bug? A spelling bee.
  2. Why did the clock go to the principal’s office? Because it was always running late!
  3. Who’s the leader of the school supplies? The ruler.
  4. What’s a math teacher’s favorite season of the year? Sum-mer!
  5. Why did the bicycle fall over at school? Because it was two-tired!

Fun kid jokes about a school of fish

  1. Why are fish considered the smartest animals? Because they live in schools.
  2. Why did the fish get bad grades in school? Because it was always swimming in the wrong direction!
  3. What did the fish say to the substitute teacher? “School’s a real splash!”
  4. Why don’t fish go on vacation? Because they’re always in a school.
  5. Why was the fish late to school? Because it was fin-ishing its homework!

Funny jokes about kids going back to school

  1. Music teacher: “Why are you late on the first day of school?” Student: “I saw a sign that said, ‘School Ahead: Go Slow.'”
  2. What did the pen tell the pencil on the first day of school? Lookin’ sharp!
  3. Why did the dog go to school? Because it wanted to learn new tricks!
  4. Why did the cat go to school? Because it wanted to improve its purr-formance!
  5. Knock, knock. Who’s there? Alpaca. Alpaca who? Alpaca the lunch, we’re going to school!

2nd grade kids jokes about school

  1. Why did the banana go to school? Because it wanted to split its time between learning and being a snack!
  2. How do you make seven an even number? Remove the “S.”
  3. Knock, knock. Who’s there? Broken pencil. Broken pencil who? Forget it. It’s pointless.
  4. Why are the dark ages named that? Because they have so many knights.
  5. Why did the pillow go to school? Because it wanted to take a nap in every class!

More hilarious kids jokes about school

  1. What did the buffalo dad say to his son at school drop off? Bison!
  2. Where do kids in New York learn multiplication tables? Times Square.
  3. Why did the kid study on a plane? He wanted a higher education.
  4. What’s a blackboard’s favorite drink? Hot CHALK-o-late.
  5. Why did the pencil go to the principal’s office? Because it needed to be sharp!
  6. Why did the broom go to school? Because it wanted to brush up on its knowledge.
  7. What’s the smartest shape? A “circle,” because it’s well-rounded in every subject!
  8. What do you call a vampire who teaches math? Count Dracula!
  9. Why did the obtuse angle go to school early? Because it heard there were multiplication tables to learn and it didn’t want to be “a-cute” to miss them!
  10. What kind of tree does a math teacher climb? Geome-tree.
  11. Why did the student put their lunchbox in the oven? Because they wanted to have a hot lunch!
  12. Why did the student bring a synonym roll to school? Because he wanted to spice up his vocabulary!
  13. What did one math book say to the other math book? “I’ve got problems.”
  14. Why don’t scientists trust atoms? Because they make up everything!
  15. What do you call a pencil sharpener that can tell jokes? A pun-cil.
  16. What’s the difference between an English teacher and a train? The teacher says, “Spit out your gum,” but the train says, “Chew chew!”
  17. What do you call a school for ice cream? Sundae school!
  18. What did one wall say to the other wall at school? “I’ll meet you at the corner!”
  19. Why did the kid bring perfect pitch to music class? Because they didn’t want to strike a wrong chord with the teacher!
  20. Why did the student bring a backpack full of rubber bands to the class trip? Because they wanted to “stretch” their knowledge!
  21. Why did the girl bring a ladder to school? Because she wanted the highest grades!
  22. Why did the math student eat their homework? Because their teacher said it was a piece of cake!
  23. How does a book stay warm? By putting on its jacket.
  24. Why did the music teacher write the lesson on the window? To make it clearer for the students.
  25. Why is 2 + 2 = 5 like your left foot? It’s not right.
  26. What is a mathematical plant? The one with square roots.
Why keep laughing all the way to class?

Laughter is the best medicine, even in the classroom! Not only does it make school more enjoyable, but it also helps relieve stress and improve focus. Sharing appropriate jokes with classmates can create a positive and fun learning environment where everyone feels included. So, encourage your kids to keep laughing all the way to class and see the difference it makes in their school experience!

With these 50 hilarious jokes about school, you’ll have your kids laughing and learning at the same time. Whether it’s a math joke, a fish joke, a knock-knock joke, or a joke about going back to school, there’s something for every kid’s sense of humor. So, why wait? Start sharing these jokes with your kids today and watch their faces light up with laughter!

Looking for an after-school sitter to care for your kids and maybe tell a joke or two? Join UrbanSitter to find after-school drivers, sitters, tutors, and more! You can find an after school nanny near you in just a few minutes.

More jokes: 20 Funny Jokes for Kids, 40 Funny Valentine’s Day Jokes for Kids

Tried, true and trusted child care

Find reliable child care solutions for all ages at UrbanSitter.

Get Busy with Spring Break Crafts for Kids

Yarn Eggs by Mod Podge Rocks

The kids are home for Spring Break, and chances are you could use a few craft ideas for entertaining them. Here are 5 Spring Break arts and crafts that are sure to keep them busy!

1. Yarn Eggs

Our first Spring Break craft idea from Mod Podge Rocks could pass as an Easter-time craft, but really it works any time of year. It’s a fun project for school-age kids who will love the process and the end result – big, colorful orbs to hang in their rooms. You’ll need thin cotton yarn, balloons, craft glue, newspaper, waxed paper, a clothespin and a hanger. The project involves making a watered-down glue mixture, dipping strands of yarn in it and and wrapping around a balloon. Once dry, you pop and remove the balloon, and you are left with a funky, colorful egg.

2. Spring Blossom Painting

The blogger from Toddler Approved created the idea for this gorgeous painting that is worthy of hanging on a prime spot on your walls. Check out her handy tutorial for a detailed how-to that includes photos of each step. Be assured that it’s a simple project involving materials you likely already have in the house, which is perfect for crafts for Spring Break… watercolor paper, paint and a Sharpie is all you need!

Blossom Painting by Toddler Approved

3. Chalkboard Flower Pots

We’ve tweaked this Spring Break craft a bit to make it more kid- friendly.  The day before you tackle this project with the kids, paint a few flower pots with chalkboard paint. The ingenious paint now comes in nearly every color of the rainbow.  Once dry, big kids they may enjoy embellishing the pots with trim, ribbon or buttons (similar to the project shown here). Kids of all ages will love using the colorful pots to plant a few fast-growing seeds or actual flowers or plants you’ve picked up from the home improvement store or local nursery, and then decorating their pots with chalk drawings that can be erased at whim.

Chalkboard Flower Pots by Paint Me Plaid

4. Button Flowers for Counting

This cute craft helps young kids count and learn to associate numbers. It’s simple, too.  Help kids use green Wikki Stix  (wax covered yarn sticks you can bend and mold to any shape) to make stems and leaves for flowers and attach to a piece of white paper.  Children can then attach a button to the top of the stem (the Wikki Stix will adhere the button so no glue is necessary). Label the stems of the flowers with any numbers the children are working on.  Have the children place the corresponding number of buttons on top of the flowers.

Button Flowers for Counting by Sixty Second Parent

5. Bunny Paper Plate Photo Frame

Here’s a cute Spring Break craft that even the tiniest tots can handle. Simply cut the middle out of a paper plate, paste cotton balls on the remaining circle, and staple two bunny ears made from additional plates and also covered in cotton balls You can either paste it around a photo of your child’s face (like a frame) or tie a string from side-to-side on the back and make a fun mask.

Bunny Love by I Love 1st Grade

Need a break from Spring Break? Find and book babysitters with UrbanSitter. Sign up for free and start searching for babysitters!

10 Easy Spring Break Staycation Ideas for Busy Families

boy scootering in the spring time
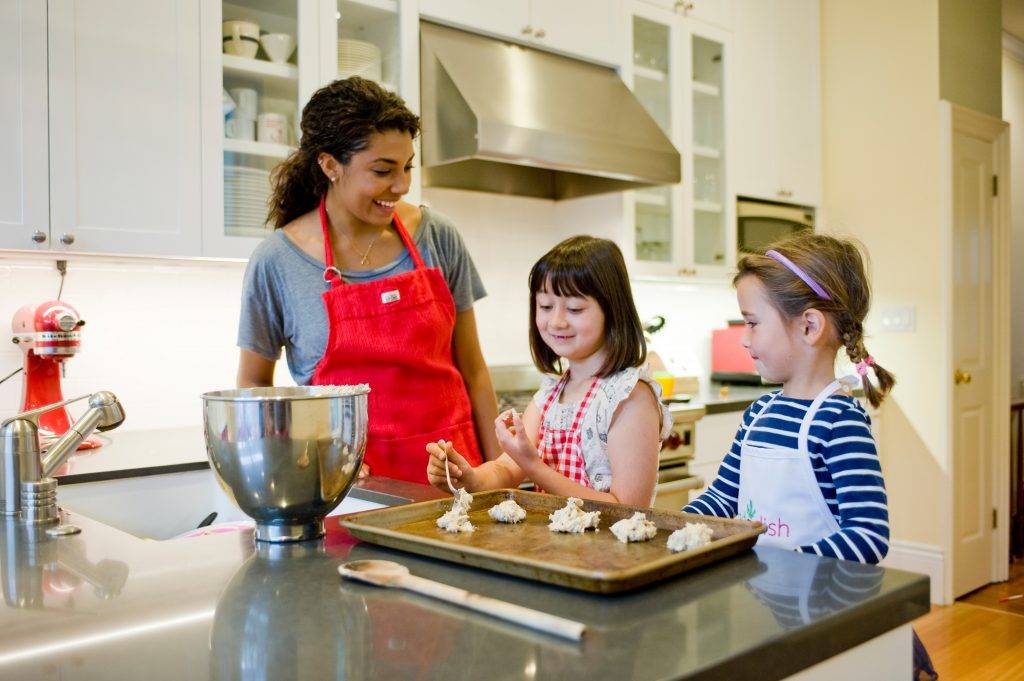
kids baking cookies with sitter

Spring break is coming. And if you’re staying home this year, you’re not alone.

With travel costs up and schedules packed, more families are choosing staycations. The good news? You don’t need a big trip to make the week feel special.

Here are simple, low-prep ideas that keep kids happy—and give you a little breathing room too.

  1. Have a backyard picnic

    No park? No problem. Lay out a blanket, pack easy snacks, and let your kids help choose the menu.

    If the weather does not cooperate, move the picnic indoors. A living room picnic still feels fun and different.

    Prep: Low
    Parent perk: Keeps kids busy for a while

  2. Plan a DIY movie day

    Turn your home into a mini movie theater. Let your kids pick the movie, grab blankets, and make popcorn together.

    You can make it extra fun with homemade tickets and favorite snacks.

    Prep: Low
    Parent perk: Built-in quiet time

  3. Go on a neighborhood adventure walk

    You do not have to go far to make the day feel new. Take a walk and explore like tourists.

    Try a simple scavenger hunt or let kids lead the way.

    Prep: None
    Parent perk: Gets everyone out of the house

  4. Try a simple baking day

    Skip anything complicated. Cookies, brownies, or boxed mixes are perfect.

    The goal is fun, not perfection.

    Prep: Low
    Parent perk: Activity and snack in one

  5. Set up a craft hour

    Pick one easy project. Painting, sticker books, or DIY cards all work well.

    Keep supplies simple to avoid a big cleanup.

    Prep: Low
    Parent perk: Focused play time

  6. Have a “yes day” (with limits)

    Pick a few fun things kids can say yes to. Ice cream before dinner or extra screen time.

    Set clear boundaries ahead of time to keep it manageable.

    Prep: None
    Parent perk: Fewer negotiations

  7. Visit the library or bookstore

    A quick outing can reset the day. Let kids pick new books to bring home.

    Build in reading time later for a calm activity.

    Prep: Low
    Parent perk: Quiet time later

  8. Plan a mini water day

    If the weather is warm, bring out sprinklers, buckets, or water toys.

    No pool needed to have fun.

    Prep: Low
    Parent perk: Burns energy fast

  9. Do a playdate swap

    Team up with another family. You host one day, they host another.

    Kids get social time, and you get a break.

    Prep: Medium
    Parent perk: Real time to focus or rest

  10. Book a sitter for a few hours

    Spring break is not always a break for parents.

    A few hours of child care can help you reset, catch up, or relax.

    Prep: Very low
    Parent perk: Everything

The takeaway

You don’t need a packed itinerary to make spring break memorable.

A few simple activities can go a long way. And getting a little help along the way? That can make all the difference.

Find trusted sitters near you and take back a few hours this week.

Looking for a babysitter or nanny?

Join UrbanSitter to find your perfect match!

7 Simple Kid’s Crafts for Mother’s Day

Mother's Day Art, Simple Art Projects for Mother's Day, Mom Art

Why not surprise a mom by helping her kids create a heartfelt, homemade gift to show their love this Mother’s Day? Roll up your sleeves, gather the supplies, and let the crafting begin! Here are 7 simple DIY gifts kids can create with a little help from you to make any mom feel special:

1. Mother’s Day Coupon Book

Download our Mother’s Day Coupon Book printable template to make an extra-thoughtful gift mom with coupons for “washing the dishes,” “folding the laundry,” and even “one hour of quiet time.” Have your little one color in and draw on each coupon to personalize it. Complement your coupon book with an UrbanSitter gift card!

mother's-day-coupon-book

2. Yarn Wrapped Bottles

Older kids can dive into a fun (and sustainable!) art project by creating yarn-wrapped vases for Mom. All you need are empty bottles, colorful yarn, and a pair of scissors. These beautiful vases are an easy and charming way to present a few flowers on her big day. 

  • Gather your supplies: Empty bottles, colorful yarn, scissors, glue.
  • Prep the bottles: Remove labels and clean thoroughly.
  • Start wrapping: Tie a knot at the top and start wrapping, securing with knots or glue.
  • Switch colors: Experiment with different yarn colors for a vibrant look.
  • Finish it off: Tie a knot at the end, trim excess yarn, and tuck loose ends.
via Huffington Post
via Huffington Post

3. Craft Stick Flower Pot

Another fun, easy craft for kids to do on Mother’s Day is to create a colorful flower pot. Find a recycled can or other small container, craft or popsicle sticks, and some glue. After the flower pot is finished, fill it with her favorite plant for a long-lasting gift that will keep her smiling.

  • Gather your supplies: Recycled can or container, craft sticks, glue, paint (optional), favorite plant.
  • Prep the container: Ensure it’s clean and dry.
  • Create the base: Glue craft sticks around the container.
  • Decorate: Add colors, drawings, or stickers for a personalized touch.
  • Fill it up: Fill the pot with Mom’s favorite plant once dry.
via Somewhat Simple
via Somewhat Simple

4. Baby Feet Butterflies

If you’re looking for an easy art project for Mother’s Day for a baby, using their fingerprints or footprints is a wonderful way to create sentimental art. One homemade gift for mom from a baby is to dip the baby’s feet into non-toxic washable paint and create footprints. After the paint has dried, turn them into butterflies with just a few swipes with a marker.

  • Gather your supplies: Non-toxic, washable paint, paper, and marker.
  • Dip and print: Dip baby’s feet in paint and make footprints on the paper.
  • Let it dry: Allow the paint to dry completely.
  • Add details: Turn footprints into butterflies with marker strokes.
  • Personalize: Write a message or date for an extra personal touch.
via Pinterest
via Pinterest

5. Tissue Paper Flowers

Truly a classic and perfect Mother’s Day craft for toddlers! Who doesn’t love a few tissue paper flowers, and even more so if they were created by the little ones they love. WikiHow tells you how to make them three ways. Gather the tissue paper, follow a few easy steps, and let the kids create a bouquet of love that Mom will adore.

  • Gather your supplies: Tissue paper, scissors, pipe cleaners.
  • Stack and fold: Stack several layers of tissue paper and fold accordion-style.
  • Secure in the middle: Use a pipe cleaner to secure the folded tissue paper in the middle.
  • Trim the edges: Round the edges or cut them into desired shapes.
  • Fan out petals: Carefully separate the layers to create a full bloom.
via Rust and Sunshine

6. Craft Stick Jewelry Box

For the elementary kids, a simple Mother’s Day craft is this beautiful keepsake box. All they need to make this box are craft sticks or recycled popsicle sticks and embellish them with anything from beads, sequins, buttons, drawings, or even stickers. Mom will love storing her treasures here.

  • Gather your supplies: Craft sticks, glue, embellishments (beads, sequins, buttons), and paint (optional).
  • Create the base: Arrange craft sticks to form the base of the box.
  • Build the walls: Glue additional sticks to create walls.
  • Decorate: Add embellishments, drawings, or paint for a personalized touch.
  • Let it dry: Allow the box to dry completely before using or gifting.
via Spoonful
via Spoonful

7. Flower Photos

A free printable background, cupcake liners, construction paper, and favorite photos are all it takes to make these adorable flower photos. Photos of children’s faces are cut into 1.5-inch circles and pasted to the center of the flowers.  Once completed, these can be used to make a Mother’s Day card or a picture frame. For a picture frame, either buy a new frame or find an old picture frame and just remove the glass to make room for the 3D flowers.

via Raising Arizona Kids


More Mother’s Day Crafts…

As you delve into the joy of crafting DIY Mother’s Day gifts, why not expand your creative horizons with more crafting ideas? Consider handprint flowers, playful pom-pom projects, endearing handprint hearts, or versatile salt dough creations. Happy crafting, and may your celebration be filled with love and creativity!

Homemade Mother’s Day crafts like these are the ones that will truly touch her heart. She’ll appreciate the time and effort you made to help the kids create such meaningful Mother’s Day crafts. UrbanSitter.com gift cards make great gifts, too!

Simple St. Patrick’s Day Crafts for Kids

As luck would have it, there are oodles of St. Patty’s Day crafts to keep your kids happily entertained. We’ve rounded up 10 of our favorites that are just right for little ones.

Simple St. Patrick’s Day Crafts for Kids

Rainbow Streamers
A simple craft made from a paper plate, paints and tissue paper strips.

Screen Shot 2014-03-10 at 12.27.30 PM
via Activity Village

Handprint Rainbow
Kids’ handprints made in every color of the rainbow lead to a pot of gold.

via The Logan's
via The Logan Family of Five

Paper Bag Leprechaun
It’s double the fun when you turn a paper sack into a googly-eyed leprechaun who makes for a perfect puppet.

via Pin Inspired
via Pin Inspired

Rainbow Necklace
Buy a box of fruity O’s cereal and help your child string a rainbow (or make it leprechaun green) on a shoe string. You’ll have a fun project, cute necklace and a yummy snack. 

via Eighteen 25
via Eighteen 25

Shamrock Bouquet
Here’s a craft that’s as much fun for Mom as it is for the little ones. Make an adorable bouquet of shamrocks using the handy template provided here, and you’ll have a happily entertained crafter and a cute centerpiece for the table.

via Sweet and Lovely

Paper Rainbow
A simple craft for even the tiniest tots. Glue dots make it even easier and eliminate the mess.

via Scrappin' Danielle
via Scrappin’ Danielle

Leprechaun Green Oobleck
If you haven’t yet played with the strange, non-edible substance called Oobleck, here’s your chance. Make a green batch!

via Oobleck
via Food.com

Green Pepper Shamrock Stamp
A green pepper easily becomes a shamrock stamp. Who knew?!

via Family Fresh Meals

Pot of Gold
There’s a template for a shamrock and a pot, but we’re guessing you won’t need them to create this adorable pot of treasures.

via Play and Learn with Dana

Leprechaun Beard
Love, love, love this DIY leprechaun beard you can make for a fantastic dress-up accessory.

via No Time for Flashcards


Search for crafty sitters on UrbanSitter.com! How will your family celebrate St. Patrick’s Day?

Fantastic Father’s Day Photo Ideas

valentine's day sitter

Scrambling to find the perfect gift to celebrate the Dads in your life this Father’s Day? You can scour the stores in search of a gift that speaks to his hobbies or wardrobe, help the kids create a craft worthy of a spot on his desk, or take one spectacular Fathers Day photo that he’ll cherish for a lifetime. The right photo says far more than any store-bought gift or last minute craft. We’ve curated a list of fun father’s day picture ideas to inspire you and your child and capture the perfect shot.

Photo Ideas for the Perfect Father’s Day Gift

via Natural New Age Mum

Write a message that’s as sweet as the tiny feet.

via House of Hendrix

Get Dad to star in a photo shoot.

via Crafty Texas Girls

Fun photo that the kids will love creating.

via Amanda Myers
via Amanda Myers

With a message and a family photo that steals his heart.

via I Can Teach My Child!

In his shoes.

via Family Share
via Family Share

This Father’s Day photo shoot idea works especially well if you have three kids!

via Indulgy
via Indulgy

Make it multi-generational for a powerful portrait of the fathers in his life.

For more great Fathers Day picture ideas and inspiration for photographing kids in general, check out our Photographing Babies and Kids Pinterest Board.

Looking for a sitter to take that special dad out for Father’s Day? Join UrbanSitter to browse profiles, sort by pay rate, and book jobs online.

10 Creative Ideas for Entertaining a Toddler (in the dead of winter!)

With temperatures reaching inhumane lows across the country, you or your sitter are likely trapped in the house with the kids and in near desperate need for new ways to keep them entertained. Save your sanity with these fun ideas for keeping little kids happy and engaged.

10 Creative Ideas for Entertaining a Toddler (in the dead of winter!)


1. Fill the tub or the kitchen sink! It’s time to bathe the toys, give the Barbies a spa day or host a car wash. If you really want to surprise your kids, hold the water and instead fill the tub with dried beans or rice and let them scoop and fill to their hearts’ content.

2. Build a slide or tunnel for toy cars to race down and under, using a piece of cardboard atop stacks of books or copy this creative masking tape roadway. Take it a step further with a DIY wasabi race track.

via Le Jardin de Juliette

3. Create a fort by draping blankets over chairs and other furniture, and pretend it’s a house, boat or a plane. The opportunities are endless. If your kids love forts, consider creating this no-sew teepee from The Handmade Home.

via The Handmade Home

4. Throw a dance party. Crank up the music and let loose. Get in on the fun and you can knock out your daily workout.

5. Brave the outdoors and create an ice skating party for dolls or action figures, a la the one by Happy Hooligans. She also has an ingenious post on making paint for painting the snow.

via Happy Hooligans
via Happy Hooligans

6. Set up a stage for an impromptu puppet show with dolls or sock puppets. Here’s a handy tutorial for making your own sock pocket, via One of a Kind Gift Ideas.

7. Toddlers love to push and pull things. Take a toy wagon or baby stroller outside and let them “mow the lawn” or plow the snow.

8. Taste test the art supplies!? Yes, break the rules and let them eat the paint with edible finger paints. You can stress less about the mess, since they are made with condensed milk. Super simple!

via Healthy Mama Info

9. Reminisce by going through family photo albums and watching videos made when they were “young.” Slightly older kids will enjoy the walk down memory lane, too. You can take it a step further by talking about their family tree.

10. DIY Matching Game. Use whatever you have on hand, from the socks in the drier to cut lengths from a few spools of ribbon to keep a toddler busy matching.

via The Fickle Pickle

What’s your favorite Winter-time activity? Have you made/done any of the pieces on this list? Tell us in the comments!

Find your perfect babysitter any time of the year at www.UrbanSitter.com.

DIY Families: 5 Home Projects You Can Do with the Kids

When you’ve got a lot of projects to take are of around the house, your first instinct might be to send the kids out of the house on play dates, or into the yard with their toys. But getting your children involved in working around the house presents many great learning opportunities and, when taught correctly and monitored appropriately, can actually help you get your work done faster!

Below are five easy home projects the whole family can get involved in, from our friends at HomeAdvisor.

1. Painting the walls. You can paint the high parts of the walls; your kids can help cover the lower areas. It’s a project most of them will love, and it also gives them a beginner handyperson’s education in undercoats and how to place tape to avoid painting the baseboards. You will need to supervise them throughout the process, but the sense of accomplishment they’ll feel when they actually get to see the completed room painted a whole new color is enormous. If they’re too little to really help, let them show their creativity by painting smiley faces, clouds, flowers, that you’ll paint over later.

2. Clean out the drains. Drains get stopped up over time, but there’s no need to use chemicals to un-clog them, unless you’ve gotten something major stuck down there. Baking soda, salt, and cream of tartar mixed together into a paste is a concoction that’s safe enough for children to use, and strong enough to get the job done. Let the kids pour this mixture down the drain, then follow it up yourself with a kettle full of boiling water you pour down yourself. Let it stand for 30 minutes to an hour, then let your kids run some fresh sold water through the drain to finish up.

3. Give the mailbox a makeover. Over time, your mailbox can take a beating. This is a great project to get your kids involved in. Wash the mailbox with sponges, water, and mild soap to remove all debris. Then decide: does the box simply need a fresh coat of paint? A new house number? Decorations like flowers or flags? Let everyone in the family have a say—and a hand in making your designs come to life.

4. Plant a container garden. Kids love to get down in the dirt, so why not redirect that enjoyment towards something with an actual purpose? They can create holes for young plants and seedlings, get them situated, and water them in. You can also let them choose some of their favorite fruits and vegetables to plant in the garden—they’ll be so excited to see the plants they’ve chosen shoot up and get bigger day by day.

5. Get them involved in overall house-cleaning. While this might seem like a big chore, you can help kids find a fun way to get involved in the process. Show them how to swish a feather duster around with flair, and they can dust off your end tables and other low-lying areas. You can also make tidying their rooms into a game: how fast can they stack the blocks, or how many dolls will fit in one cubby? Not only does this help you (a little), it helps your children learn good practices that will benefit them through their whole lives.

Crafty Kids: How to Make a Beaded Woven Plant Hanger

It’s spring, which means it’s a great time to bring some nature inside for you and the kids to nurture and enjoy. These easy decorative plant hangers are easy to bead together—think of them as macramé without the fuss. And they serve a three-fold purpose: they provide a fun craft for an otherwise dull afternoon; they enliven boring terra cotta pots; and they get plants up off the floor and other easy-to-reach surfaces where they can be easily knocked over.

These come to us from our friends at Crafting Community and we think you’ll have so much fun making them you won’t be able to stop at just one!

What you’ll need:

  • 2 7-foot lengths of butcher’s twine, or other sturdy rope
  • A yardstick
  • Assorted colorful wood beads
  • Assorted small, low-maintenance plants from your local nursery; cactuses and other succulents make good choices

1.     Stretch out your two pieces of twine together, fold them in half, and knot them together in the center, 2 inches from the top of your loop. Line them up as pictured on the yardstick, splitting the 4 strands into 2 groups: AB and CD

2.     Add a few beads to the strands in each group, then secure group AB with a knot 17 inches down from your top knot; repeat for group CD, making sure the knots are even.

3.     Four inches below your last set of knots, knot B & C together, and A & D together. Again, make sure the knots are even.

4.     Repeat step 3, knotting strands from opposite groups together.

5.     Two inches below your last pair of knots, knot all 4 strands together.

6.     Test out your pot in your hanger, making any adjustments to knots that may be necessary.

.     Find a sunny window and display!

Crafty Kids: How to Make Beaded Key Fobs

The title of this craft begs the questions: what exactly is a fob, and why on earth would any kid want to make one (aside from the fact, of course, that they’re really pretty)?

Traditionally—meaning, in the late 19th century—a fob was a decorative chain that attached your pocket watch to your person. Since not many folks wear pocket watches anymore, the craft is reimagined here by our friends at Crafting Community as a decoration for a key. And as every kid knows, getting your own key to the house is an enormous rite of passage, one that symbolizes a surge in responsibility as well as a parent’s recognition of it.

Why make a key fob? To celebrate that oh-so-important key and make it look as important as it really is. Not to mention, help your kid find it in her cluttered backpack!

What you’ll need:

Plastic lacing
Scissors
Metal clips
Pony beads in assorted colors

1. Start with about 6 feet of plastic lacing, fold it in half, and put it on a metal clip.

2. Thread your first bead onto one end of the cord, then thread the other end of the cord through the opposite side of the bead.

3. Begin your design by adding the next row of beads. To do this, slip on 2 beads to the right half of the lacing and then thread the left side of lacing through both beads.

4. Continue to increase or decrease by 1 bead each row until your design takes shape. Once your design is finished, make a knot and hide the little ends under the last row of beads. Now it’s time to hook on that key!