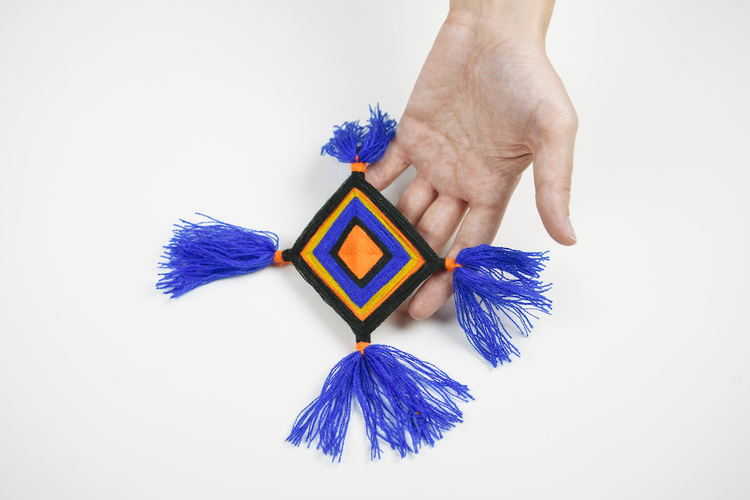
The ojo de Dios (Spanish for “eye of God”) is a folk toy with origins among the Huichol Indians of the Sierra Madre. The four points of the crossed sticks are said to represent the elements of earth, air, water, and fire; the finished eye, replete with alternating stripes of yarn, is meant to offer health, fortune, and long life.
Extremely simple to put together, this bright, festive craft from our friends at Crafting Community forms the base for a great crib mobile—something for an older sibling to make for the new baby in the house. It’s also a super entry point for talking to kids about American history—and for parents to learn a little something, too.
What you’ll need:
Two sticks of equal length
Brightly colored yarn in 3 or 4 color
Scissors
1. Grab two sticks and tie them together in the middle with the end of your ball of yarn. Twist the sticks to form a ‘+’.
2. Wrapping in a clockwise direction, wind your yarn over and around 1, then 2, then 3, then 4. (See image at right for technique).
3. To switch up your colors, simply snip the yarn you’re working with and tie on a new color. Trim the excess and continue wrapping.
4. To finish your god’s eye, top knot your yarn around your final stick twice. Trim the excess yarn and you’re done!
To add tassels:
1. Loop yarn around your fingers 15x
2. Thread another piece of yarn through your loop and make a knot with long tails. Cut the end of your yarn loop to create fringe.
3. Tie your tassel on, knotting it to your gods eye on the back side.
4. Wrap one side of the tails around the arm of your gods eye several times, then knot it to the other tail to finish.
A super quick and easy model to put together, this floating container ship is made from a couple of old dishwasher or washing machine liquid bottles, along with a few other bits and pieces. There’s plenty of fun to be had both making and playing with it—kids love naming their ship, writing its name on it in permanent marker, and then sailing it across the great Bath (or Swimming Pool) Ocean.
What you’ll need:
Glue gun
Marker
Craft knife
Large dishwasher soap bottle
Small dishwasher soap bottle
Piece of cardboard
A few small stones
Shower gel bottle
Milk carton cap
Liquid detergent bottle cap
Yogurt cup base
1. To make a floating ship, you’ll need a plastic bottle for the hull, and another, smaller bottle for the cabin. Mark lines around the bottles following the diagram above, using a permanent marker. Use your craft knife to cut.
2. Place the hull part upside down on a piece of thick cardboard and draw around it with a marker.
3. Cut out the deck slightly inside the line so that the cardboard will just fit inside the hull.
4. Cut some small supports out of cardboard, at the right height to allow the deck to be slightly recessed. Glue these to the underside of the deck. Glue around the edge of the deck and slide in. Glue the milk bottle top into the detergent bottle opening. To prevent your ship from being top heavy, glue a few small stones inside the hull before you glue the deck into position.
5. With deck in place, glue around its seams to make sure it’s waterproof.
6. Glue the cabin upside down to the deck, then glue the yogurt cup end to the deck.
7. Cut the end off a shower gel pack and glue to the front of the cabin to make the bridge. Glue a detergent bottle top to the top of the bridge to make a funnel.
8. Decorate with marker, then get ready to launch your ship!
Excerpted from Made with Dad by Chris Barnardo, (c) 2015 Skyhorse Publishing.
Duct tape crafts have been hot for the past couple of years because a) they’re easy to put together and b) pretty much every child loves tape! You can help boost the excitement for back-to-school in your kids and tweens with these two fun (and useful) crafts from our friends at Duck Brand Tape.
Chalk Circle Calendar
You will need:
Cardstock
Scissors
Duck brand chalkboard tap
Duck tape
1. Make a 1-1/2-inch template for your day-of-the-week circles out of cardstock, then trace the template on the back of the chalkboard tape, 42 times, at cut each circle out.
2. Trace letters for the days of the week on the back of the Duck tape, then cut out and stick one of each to 7 of the circles.
3. Now, piece by piece, stick your calendar to your wall, inside your closet, wherever it’s handy!
Desk Organizer
You will need:
12 empty Duck tape rolls
Duck tape
Scissors
1. Tape 2 empty Duck tape rolls together to get a double-long tube. Fold over any excess tape. Then, cover the inside of the roll with Duck tape, too. Repeat 5 times.
2. Using thin strips of Duck tape, attach the tubes to make a pyramid shape. Now you’re ready to load your organizer up with all your pens and pencils for the school year!
Finding projects to do around the house and yard with your kids is a great way to engage and teach your children. When choosing projects, it is important to consider two things: whether it requires adult supervision and if it engages or intrigues your kids. You want a project that awes and teaches them. Here are some fun projects that get work done around the house and keep your child entertained at the same time.
Paint a Room Together Kids love to finger paint and work with paintbrushes on paper, so why not give them a canvas like a wall in a room? You can teach them the proper way to move a roller up and down, or you can let them go crazy—to a point—on a wall. Laying down plastic sheets on the floor and painter’s tape over the molding and baseboards will protect them from getting stained or needing a new coat of paint. This will also allot your child the opportunity to feel like they contributed to a project in the house, even if you might have to do a little repainting later.
Grow a Vegetable Garden Growing an easy vegetable garden is a fun and simple thing to do no matter where you live. If you do not have room in your yard, you can buy a large pot and fill it with soil. There are plenty of vegetable types that will grow in pots. Carrots, bush beans, herbs and radishes are all easy vegetables to grow nearly anywhere. Have your kids plant the seeds and then instruct them on the watering schedule. Once the vegetables are ready to harvest, make sure to cook them up and let your kids take pride in the vegetables they grew.
Install Stepping Stones in the Backyard Making stepping stones is a great project to do with kids, and it adds an artistic flare to backyard gardens, patios or walkways. The creativity with this project is unlimited as you can make your own molds with old pans, wood or just about anything that will aide in creating a stone two inches thick. Use ready-mix concrete or mortar and a 40-pound bag will make three to five stones, so plan accordingly.
While you do the prep work of mixing the concrete, have the kids find decorative objects such as beads, pebbles, old marbles or anything else hard and decorative. When the concrete is wet, the kids can add the decorative items. It will take about 48 hours for the concrete to set and then you can remove it from the mold and install it where you choose.
Plant Solar Lights Adding solar lights to your garden, walkways or lawn perimeter is simple, fun and creative. Solar lights come in a wide range of styles, anything from basic lights to whimsical creatures. The lights are also supremely easy to install, and your kids can enjoy staking them in whatever location you, or they, choose. Make sure and take them out to see the lights coming on at night. Some tips for installing solar lights to get the most out of them are as follows:
Avoid putting them in places where they could be obstructions.
Put them in places to highlight a feature, such as a garden or pathway.
Make sure to put them in places that maximize sunlight.
These four projects will require some initial prep work and instructions, but once underway, they should occupy children without much hands-on help from adults.
Andrea Davis is the editor for HomeAdvisor, which helps homeowners find home improvement professionals in their area at no charge to ensure the best service in the shortest amount of time.
Once the final school bell of the year rings, keeping the kids engaged and occupied for the next three months lies solely on you and whatever childcare you’ve lined up for the summer. Fear not! We’ve found 6 totally free, downloadable printables, guaranteed to be welcomed diversions on more than one rainy day, long car ride or when you simply need a moment to yourself.
ABC Practice: This letter tracing sheet will keep beginning writers sharp and help ABC newbies learn and practice their letters before the start of preschool or kindergarten. The clean, watermark-free file is also nice to frame as artwork or at least to keep in the baby book. (via Back House White Shutters)
Travel Bingo: There are six of these save-your-sanity bingo cards that are beyond perfect for the family road trip. They have pictures along with the words, so even little ones can play. You can print them on card stock and have them laminated or place each in a page protector. As kids find an object on the card, they can mark it by placing a sticker on it or use a dry erase marker. (via Simple As That)
Reading with Kids: For older kids or for those who like a bit more of a challenge, Reading with Kids provides dozens of color-by-number and color-by-letter printables. Simply use the code at the bottom of each pages to determine how to color each space. A picture is revealed when all the spaces are colored. (via Reading with Kids)
Dr. Seuss Word Search: Word searches are fun, attention-grabbing and just the right activity to bring to a restaurant, on a road trip or as a quiet activity for rest (in lieu of nap) time. Here’s a cute word search with words from the popular author. If you’d rather make your own, providing the words and controlling the difficulty level, check out Discovery Education’s Puzzlemaker. (via Jinxy Kids)
For more great printables, including finds to keep your family entertained, organized and sharp, check out our Pinterest Printables Board. You, your kids and your sitter will be glad you took the time to download a few sanity savers!
Decorating Easter eggs with kids isn’t always as easy as it sounds. Fragile eggs + stainable dye often equals disaster, or at least a somewhat anxious parent or sitter. This year, opt for one of these simple, yet very cool techniques for decorating eggs with kids. They are fun to do and create some pretty impressive looking eggs.
1. Chalkboard Eggs How cool are these black eggs?! A really fun, graphic take on the traditional, dyed Easter egg, these funky eggs are just as easy to create as the dip-dyed version. Paint hard-boiled eggs with chalkboard paint – 2-3 coats are recommended for good coverage – and have kids doodle with chalk or wet chalk markers, which create really vivid color that pops against the black background. The blogger behind this DIY suggests creating a trough out of aluminum foil for holding the eggs while they dry. See her complete tutorial with handy photos for help.
via Brett Bara
2. Neon Eggs Wow, food coloring has come a long way since we were kids! Pick up a box of Neon Food Coloring to create these eye-popping Easter beauties. These were created by dripping rubber cement over hard-boiled eggs before letting them sit in neon dye for at least five minutes. The long soak might be tough for the kids to wait out, but the results are worth it.
via Kirsten Gab
3. Glitter Eggs Pull a Martha and forego the dye for a good douse of sparkly glitter. The fancy version of these glittery eggs calls for blowing the eggs out so you’re just decorating the shell. The technique makes the egg last for more than one season, but to make it a kid-friendly craft, forget the fragile shell and instead boil the eggs…making peace with the fact that you’ll have to toss them after a few days.
via Martha Stewart
4. No-Dye, No-Mess Eggs Just as pretty as dyed eggs, but way less mess. In other words, very kid-friendly… which translates into quick and easy. Instead of having kids plunk eggs into baths of dye, have them stick hard-boiled eggs with adhesive dots and roll in colored glitter.
via Mindful Mum
5. Water Color Easter Eggs Pretty eggs that are fun for even really little ones to create. Use a baking sheet to collect the extra dye that falls when simply spooning dye over eggs. Let dry completely after applying a color so the next color you add won’t run and turn your masterpiece into a muddy mess of muted shades.
via Spoon Fork Bacon
If these DIYs are a bit more work than you bargained for, opt for the even simpler techniques of decorating eggs with stickers, markers or temporary tattoos. You and your kids will have just as much fun!
You’ve seen a million lists like this one, but it never hurts to have some fresh ideas. When you’re stuck in the house and the natives are restless, give one of these a shot.
5 Rainy Day Activities
1. Tupperware bowling. Line up your BPA-free lunch containers in the kitchen or hallway and give any type of ball a roll. See how many you can knock down. Kids love anything involving destruction and they can even help set up the “pins.” You can make a more challenging formation for older kids and keep track of spares and strikes, just like in a real game. No grimy shoes required.
2. A bath. Who doesn’t love a warm bubble bath on a cold day? With babies or toddlers, don’t be afraid to climb in with them – and let your little one choose a toy or two to submerge. Most plastic toys do just fine in water and some might need a bath anyway. Race tracks are particularly fun in water as are play kitchen utensils, pots and pans. With older kids, you may even get to read a magazine while sitting on the toilet seat.
3. Baking. Anything is fun when kids get to “help.” Don’t make it a dish you need to present at a fancy dinner party. Search your pantry for something easy and kid-friendly. Banana bread, cookies with M&M’s, even lasagna for dinner (as long as little hands are nimble and super clean) are great options. Older children can help read measurements and set the oven timer. Little ones can pour and stir. Baking is a great hands-on activity and is sure to please when the timer dings.
4. This Is Your Life, starring your child(ren). Kids love to look at photos and videos from when they were babies. If you don’t have a baby book, start with any loose photos in a drawer, digital files, ultrasound pics, the invitation to your baby shower, and any videos Dad made — first steps, first words, first bike ride. Oldest children will benefit most (why do we run out of photographic energy with each respective child?!), but even the youngest ones will delight in seeing you pregnant (“I was in your tummy!”) and if you’re lucky, he or she can help you organize and perhaps even create a photo album or online photo book.
5. Magazine arts and crafts. Find some old magazines, catalogs, or newspaper advertisement inserts — maybe even an old book or two — and let them go to town with scissors and glue. Cutting and pasting pictures onto construction paper is fun for everyone. A holiday or birthday list is always enhanced by photos of coveted items, and creating a “book” can be fun, too, complete with cast of characters from the PB Kids catalog and reality television.
Whatever you choose do to on a rainy day, just rest assured the weather will turn soon enough, and know that your kids love the bonding time with Mom or Dad. Enjoy!
Browse babysitter and nanny profiles, and schedule interviews at the click of a button at www.UrbanSitter.com.
Ahhh, Autumn. It’s many people’s favorite season, and for good reason — the nip in the air, the crisp leaves, the pumpkin-flavored espresso drinks — to name just a few. And for little ones, there’s loads of fun to be had. Why not take the whole family and indulge in one of these sure-to-please Fall diversions on your next free weekend?
1. Pumpkin Patch
Now, this one is a classic, tried and true. Children are just as pleased with a trip to the super market aisle or an off-the-freeway patch complete with jumpy house. But most counties have at least one big, fall-festival-like patch with a corn maze, hot cider stand, and maybe even a petting zoo.
These off-the-beaten-track spots offer a little something extra and really bring the experience home. Plus, the car ride builds anticipation. Check out these safe, no-carve pumpkin decorating ideas.
2. Apple Picking
If you venture out a little further into the country (or deep suburbs in some spots), you can usually find a place to pick apples when Fall rolls around.
A family farm is the typical backdrop and kids as young as one or two can join in the fun. Apple orchards are heaving with fruit this time of year and for a small fee, you can borrow a basket and pick as many you like (or want to pay for), as you meander amongst the trees and livestock. Have a taste or make apple cider at home! This is a fun, easy activity for families and makes for a great photo op as well. Some farms require an appointment, so do your research.
3. Pie Making
Once you’ve picked your apples (or purchased them at the grocery store), why not share the experience of making a home-made pie with your kids?
Whether you have Grandma’s tried and true recipe or one just downloaded, the kids will love the hands-on experience…and delectable result. You can even let the kids use cookie cutters to decorate the crust….easy as pie! And sure to fill your home with a delicious Fall aroma.
4. Jumping in Leaves
A classic straight out of a Normal Rockwell painting. But truly, leaf jumping never gets old for kids–or even dogs. Just use a standard rake to gather the leaves in your yard and let them go to town. Of course, you will have to deal with the end product — a mess of crispy leaf bits, but it’s worth it…right?
If you don’t have a yard full of leaves, head to your favorite park and do the same. In that case, the kids will have to gather the leaves themselves, but that in itself can be a great diversion.
Whatever you do this Fall, enjoy yourself! It’s a cozy season filled with rosy cheeks, full moons, and warm sweaters. Plus, before you know it, the madness of the holidays will be upon you. So get out there!
Experts estimate that kids spend the first 2.3 months of the school year learning what they’ve forgotten over the summer. Yikes!
Help your kids brush up on their skills, before the first school bell rings, with these effective learning tools that can easily pass as fun games and entertainment.
Free, printable alphabet handwriting worksheet in a fun Back-to-School theme. Traceable worksheets help preschoolers through First Graders learn to write letters A to Z in upper and lower case. The worksheet features a start dot on each letter to help kids remember where to start writing the letter. Tip: Laminate and use fine tip erasable markers for repeated use.
LEGO activities are a visual way for kids to do math. And for the LEGO enthusiast, this might just be the sure-fire way to encourage math practice. The printable worksheet is great for kids to work on addition and subtraction. For younger kids, simply use LEGOS to work on colors, sorting and counting.
Research has shown that the single most important thing that a parent can do to help their child acquire language, prepare for school, and instill a love of learning is to read to them (Russ et al., 2007). If you need a few new books to add to your repertoire, check out Cool Mom Picks Roundup. They have compiled an awesome list of their editors’ own children’s favorite books, including picks for ages 2-12.
Little kids can work on motor skills, letters and numbers with a simple puzzle that includes all 26 letters of the alphabet in uppercase and lowercase, along with 26 gorgeously detailed illustrations of various animals. $11.99 at Target.
If you’re in the camp that believes in embracing the power of technology as a teaching tool, try out these educational apps for preschoolers. The list includes practice games for handwriting, letters and numbers for iPad and iPhone devices. Costs vary.
You can avoid the time and mess of cutting letters out of magazines for your child to use for literacy exercises – such as finding the alphabet or creating words or phrases – with this super cool Magazine Letter Printable, just $7 from Etsy.
Verbal games are great for developing speaking and listening skills, and thinking and reasoning abilities. They are ideal to play on a long car trip, or while your child’s hanging out in the kitchen while you make dinner. Try them with kids age 3 and up.
Photo: Childhood 101
All of these games and activities are great to leave with the babysitter. Find trusted babysitters and nannies at UrbanSitter.com.
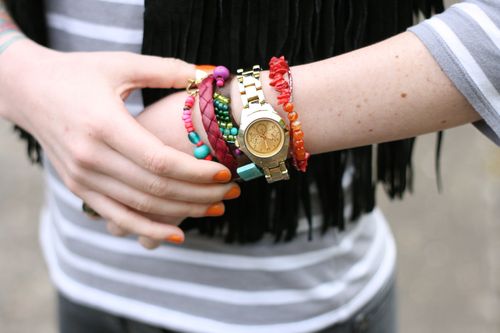
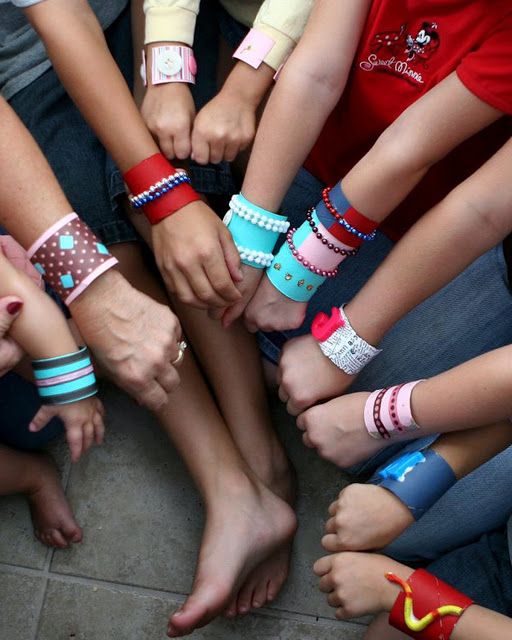
Have you noticed that bracelets are all the rage these days? You can get current and also score big points with your child by arming your babysitter with these awesome DIY bracelet craft ideas. We’ve rounded up 10 DIY Bracelets that kids – little and big, girl and boy – will go wild to create and wear!
Thank you Molly Moo for providing the inspiration and showing us how to make popsicle sticks pliable enough to wrap around a glass into the shape of a bracelet. Once the sticks are dry, you can decorate them with wasabi tape (for instant gratification) or embroidery thread with the ends of the thread capped with beads for a dangly look.
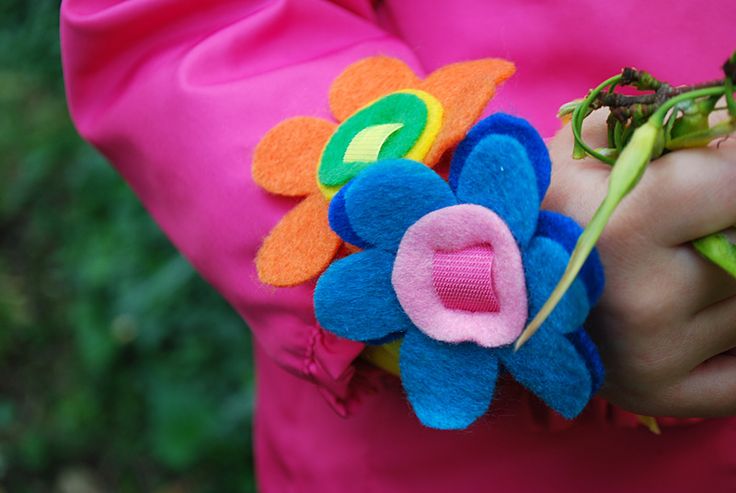
Though gorgeous, this craft require a bit more manual dexterity and involves more steps than some of the others. The bracelets are delightful for little kids to wear, but plan on your sitter, an older sibling or yourself doing much of work. You can download a free pattern for the felt flowers and you’ll need to purchase a roll of Velcro, along with felt. Merriment Design recommends something called Velcro Plant Ties, which is basically a roll of a thin strip of Velcro, which will serve as the base of your bracelet.
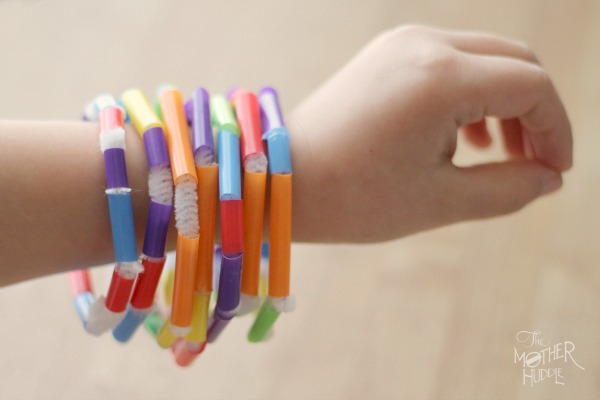
Here’s a simple, sweet project perfect for tackling when you have really little kids involved. The bracelet is cute enough that older kids won’t mind that it’s as easy as cutting drinking straws into pieces (an adult can do the cutting for little ones) and stringing them onto pipe cleaners, which are then twisted to form a bracelet. You can get bigger kids more interested by encouraging them to create patterns with the different color pieces.
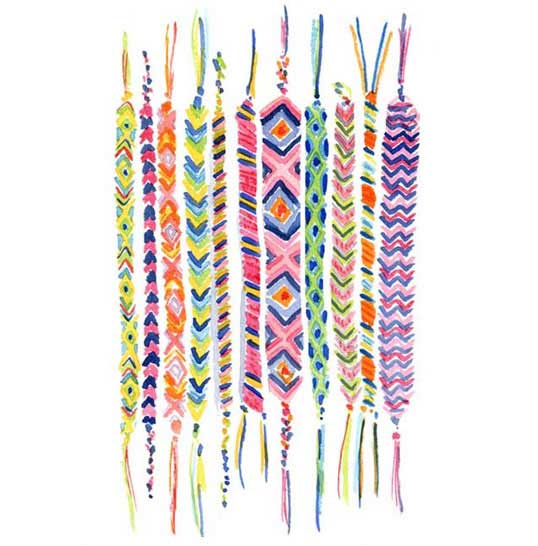
Wow, these bring back memories! Remember making these when you were a kid, loading up your arms with them and gifting and trading them with friends? If the how-to isn’t too fresh in your mind, check out this great tutorial from Apartment Therapy. It’ll be like riding a bike. Before you know it, you’ll be whipping out a few to bestow on your little one and maybe just helping her to start a new trend in the hood.
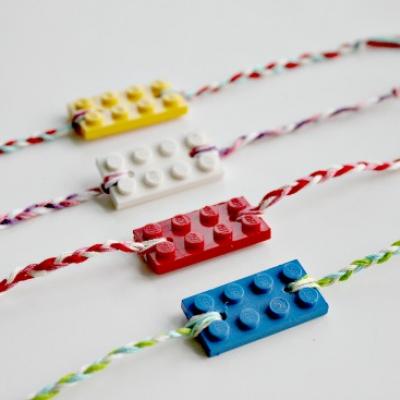
What’s just as popular with kids as bracelets? Why, LEGOSs, of course. There is a small supply list for these, though be forewarned that the project requires a drill. Thanks to The Centsible Life for listing the requirements – (lots of) flat LEGO bricks, a drill and 3/32″ drill bit, embroidery thread (three colors per brick) and scissors. You or a handy sitter will need to prepare the bricks for your kids to string by stacking bricks and drilling a small hole on each end of the stack. Complete instructions included here.
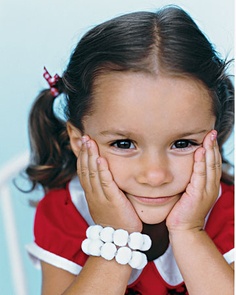
Martha Stewart showcases Pom Pom bracelets as a winter holiday accessory, which would be lovely, but we think they’d also make for cheerful, colorful, summery arm candy. Buy pom-poms with holes in them, and help kids thread them onto clear stretchy beading cord. Tie off the ends with several double knots.
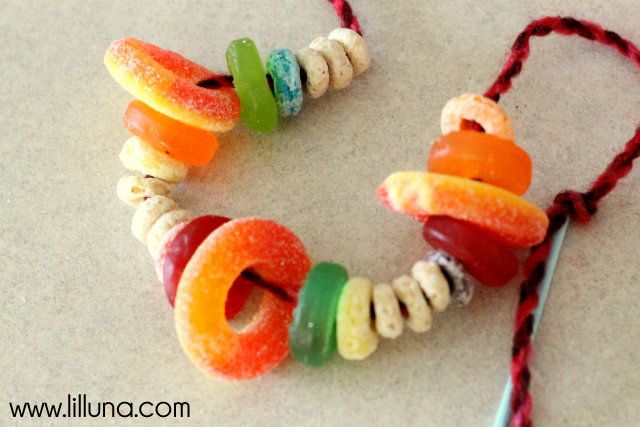
Imagine telling your kids you are about to provide a fun craft to make, candy to eat and a new piece of jewelry to wear! You’ll need to hit the candy and cereal isles to stock up on supplies for these yummy, wearable treats. Lila Luna used Cheerios, Froot Loops, Peach Rings and Gummy Lifesavers, but any candy or cereal with a hole in the middle will work. Simply help kids string them on length of yarn. It’s helpful to use a blunt, plastic needle for threading.
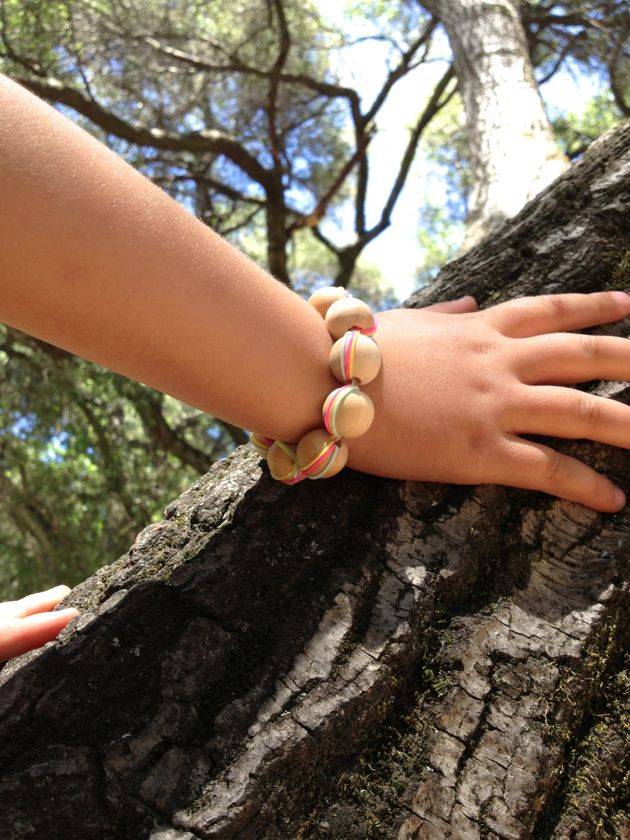
Here’s a sweet, modern take on old-school wooden beads on a cord. You need nothing more than a bag of ¾” wooden beads, 1mm stretch cord (three colors are ideal, but you can certainly make these with more or less), and scissors to cut the elastic-like stretch cord. Playful Learning gives a simple tutorial:
Count out 10-12 beads
Measure 3 strands of stretch cord at 18”
Holding ends together, thread cord through the first bead.
Pull the ends through, wrap them around the bead, and pull back through
Pull taut to secure, leaving about 2” of cord length at the end
Using the remainder of the cord, repeat looping and pulling through on the remaining beads until all ten are lined up snugly.
Double knot and tightly tug the cord taut at the end and trim to about 1/4”
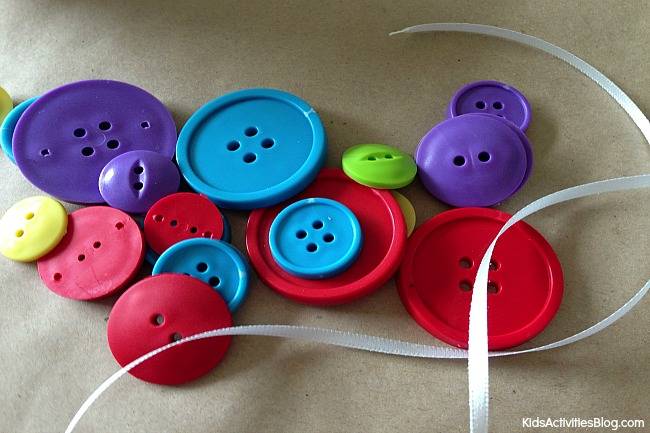
A button bracelet is excellent for building fine motor skills. You can cater to your child’s age by using buttons with bigger holes for little kids and smaller buttons for older kids. Buttons with smaller holes will require a needle for threading the ribbon. You can find blunt needles that are safer for kids to use. Simply gather a collection of buttons and some ribbon to string through the holes. Weave the ribbon through the buttons, coming up from underneath the button, crossing over the top, and dipping back down again on the other side of the button. Once you have threaded on enough buttons for the length of your bracelet, tie the two ends of ribbon together and voila, a new bracelet!
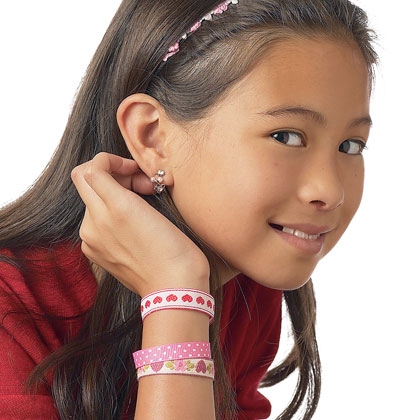
Not your ordinary friendship bracelet, these lovelies have a secret message written on the inside. And just as nice, they take only minutes to make. You’ll need ribbon, self-adhesive Velcro (bought as precut circles or strips you cut yourself), tacky glue (optional), a white office label and a pen or marker to write your message. Instructions via Spoonful: Cut the ribbon into a piece long enough to wrap around your child’s wrist with extra for folding under the ends. Fold down one end of the ribbon and adhere one half of a Velcro piece, then flip over the ribbon, fold down the end, and attach the other half of the Velcro. Add a drop of glue under each piece of Velcro if needed (depends on the ribbon and Velcro used). Cut the label to fit (if necessary), write a message on it, then stick it to the inside of the bracelet.
Secret Message Ribbon Bracelets via Spoonful
Remember, there are plenty of crafty babysitters ready and willing to lead the charge if DIY is not your thing!